THEME PARK ITINERARIES
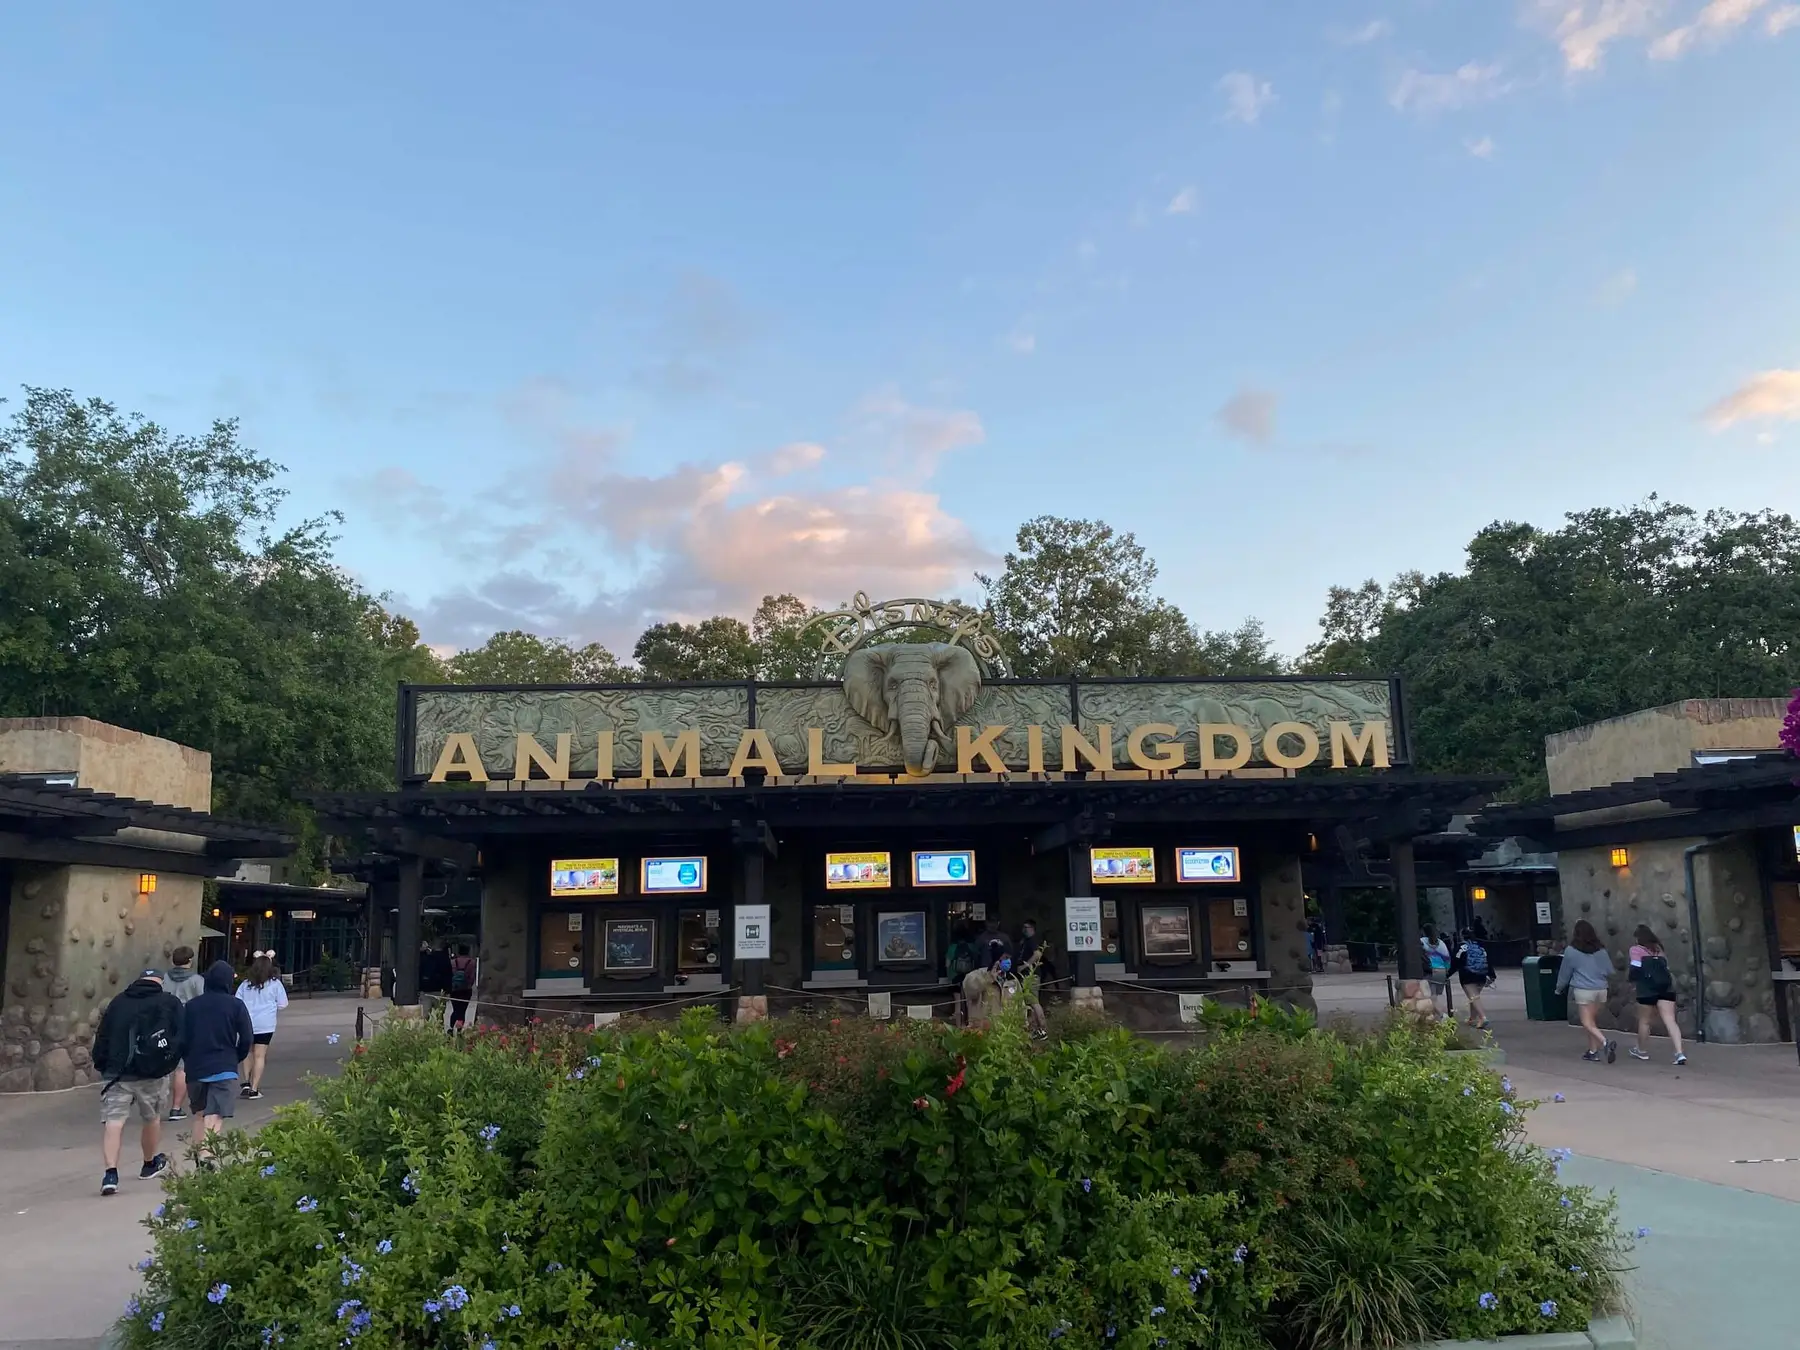
Animal Kingdom
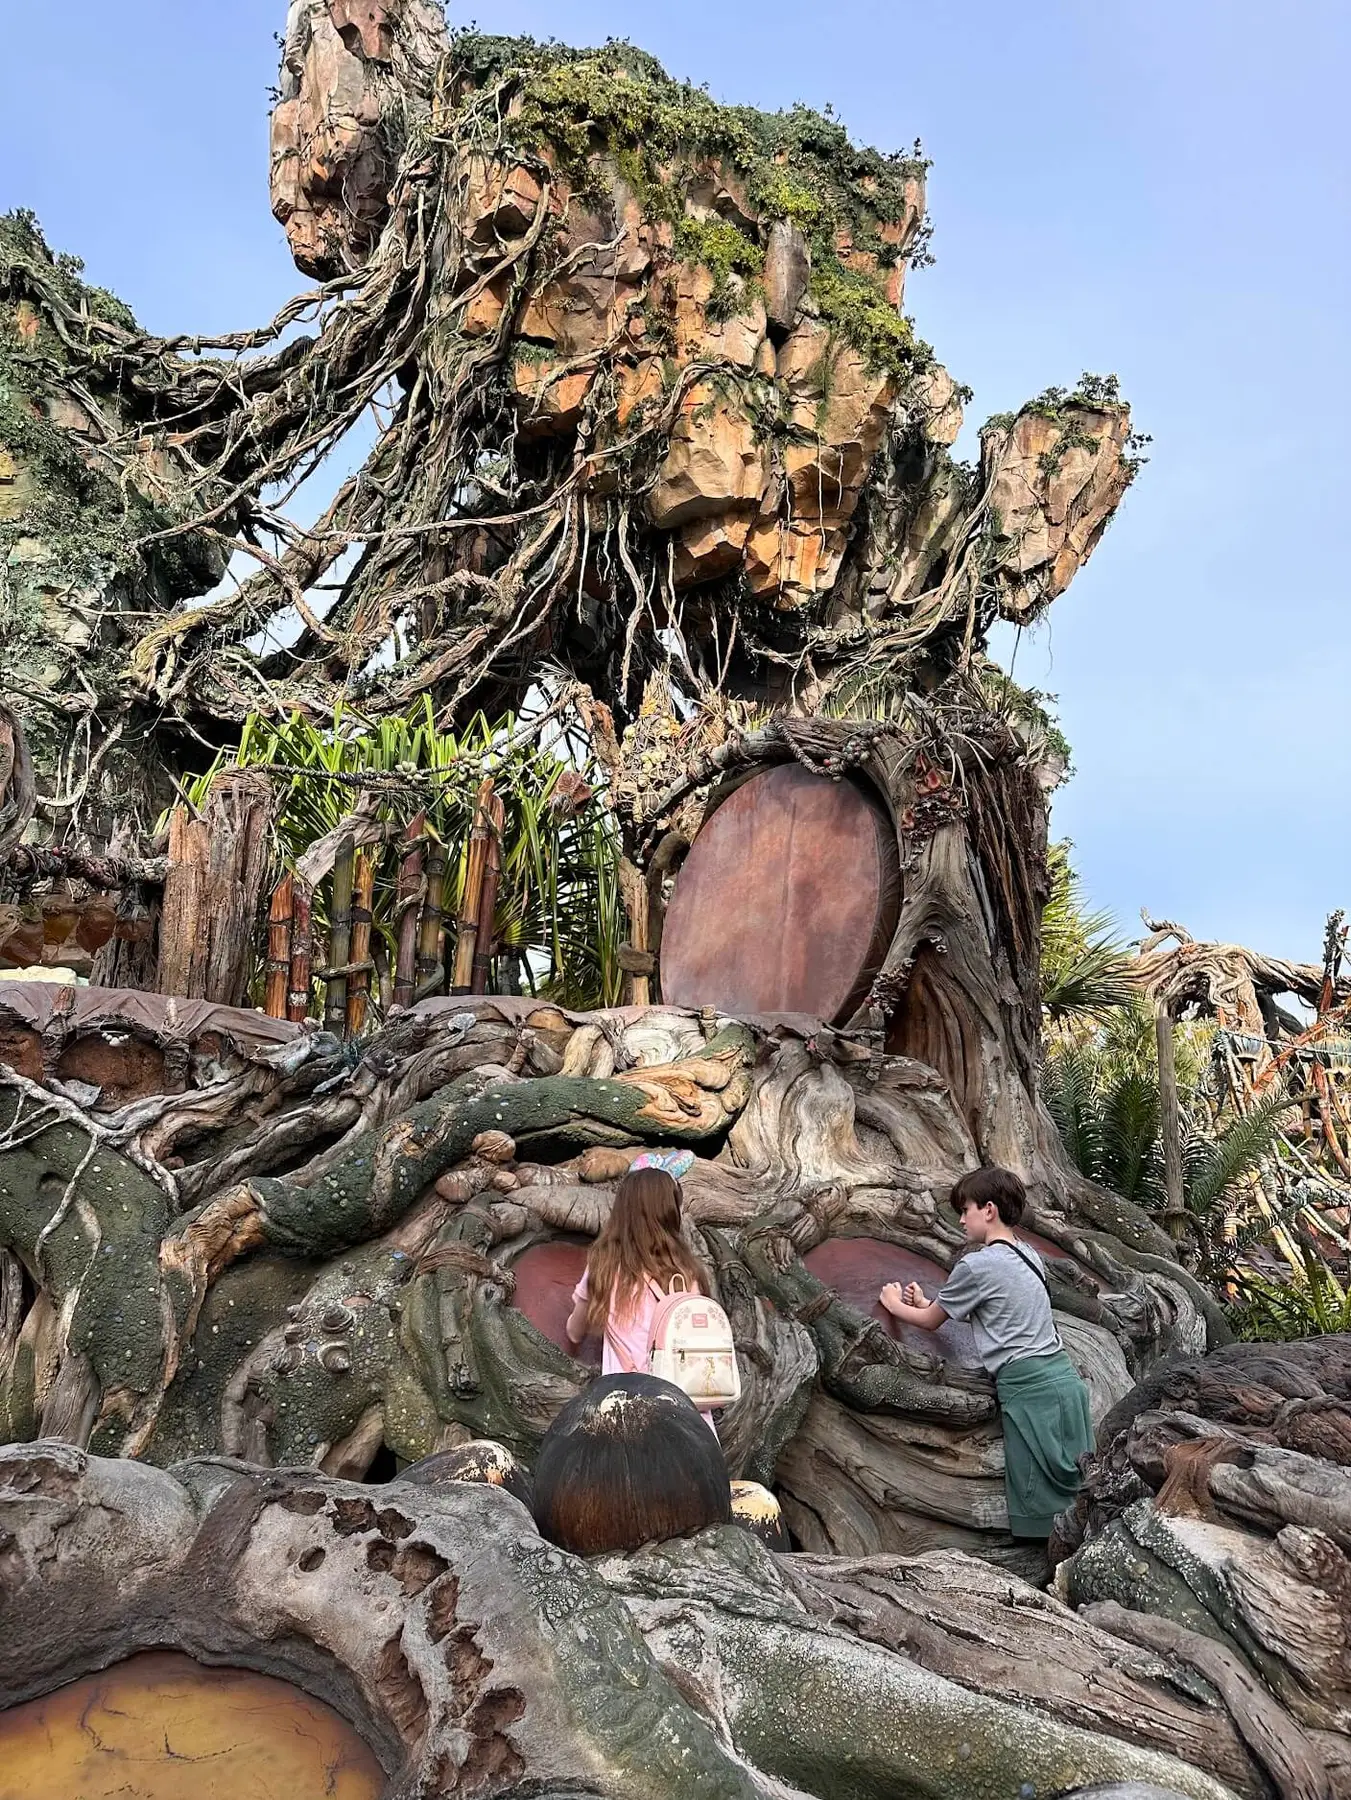
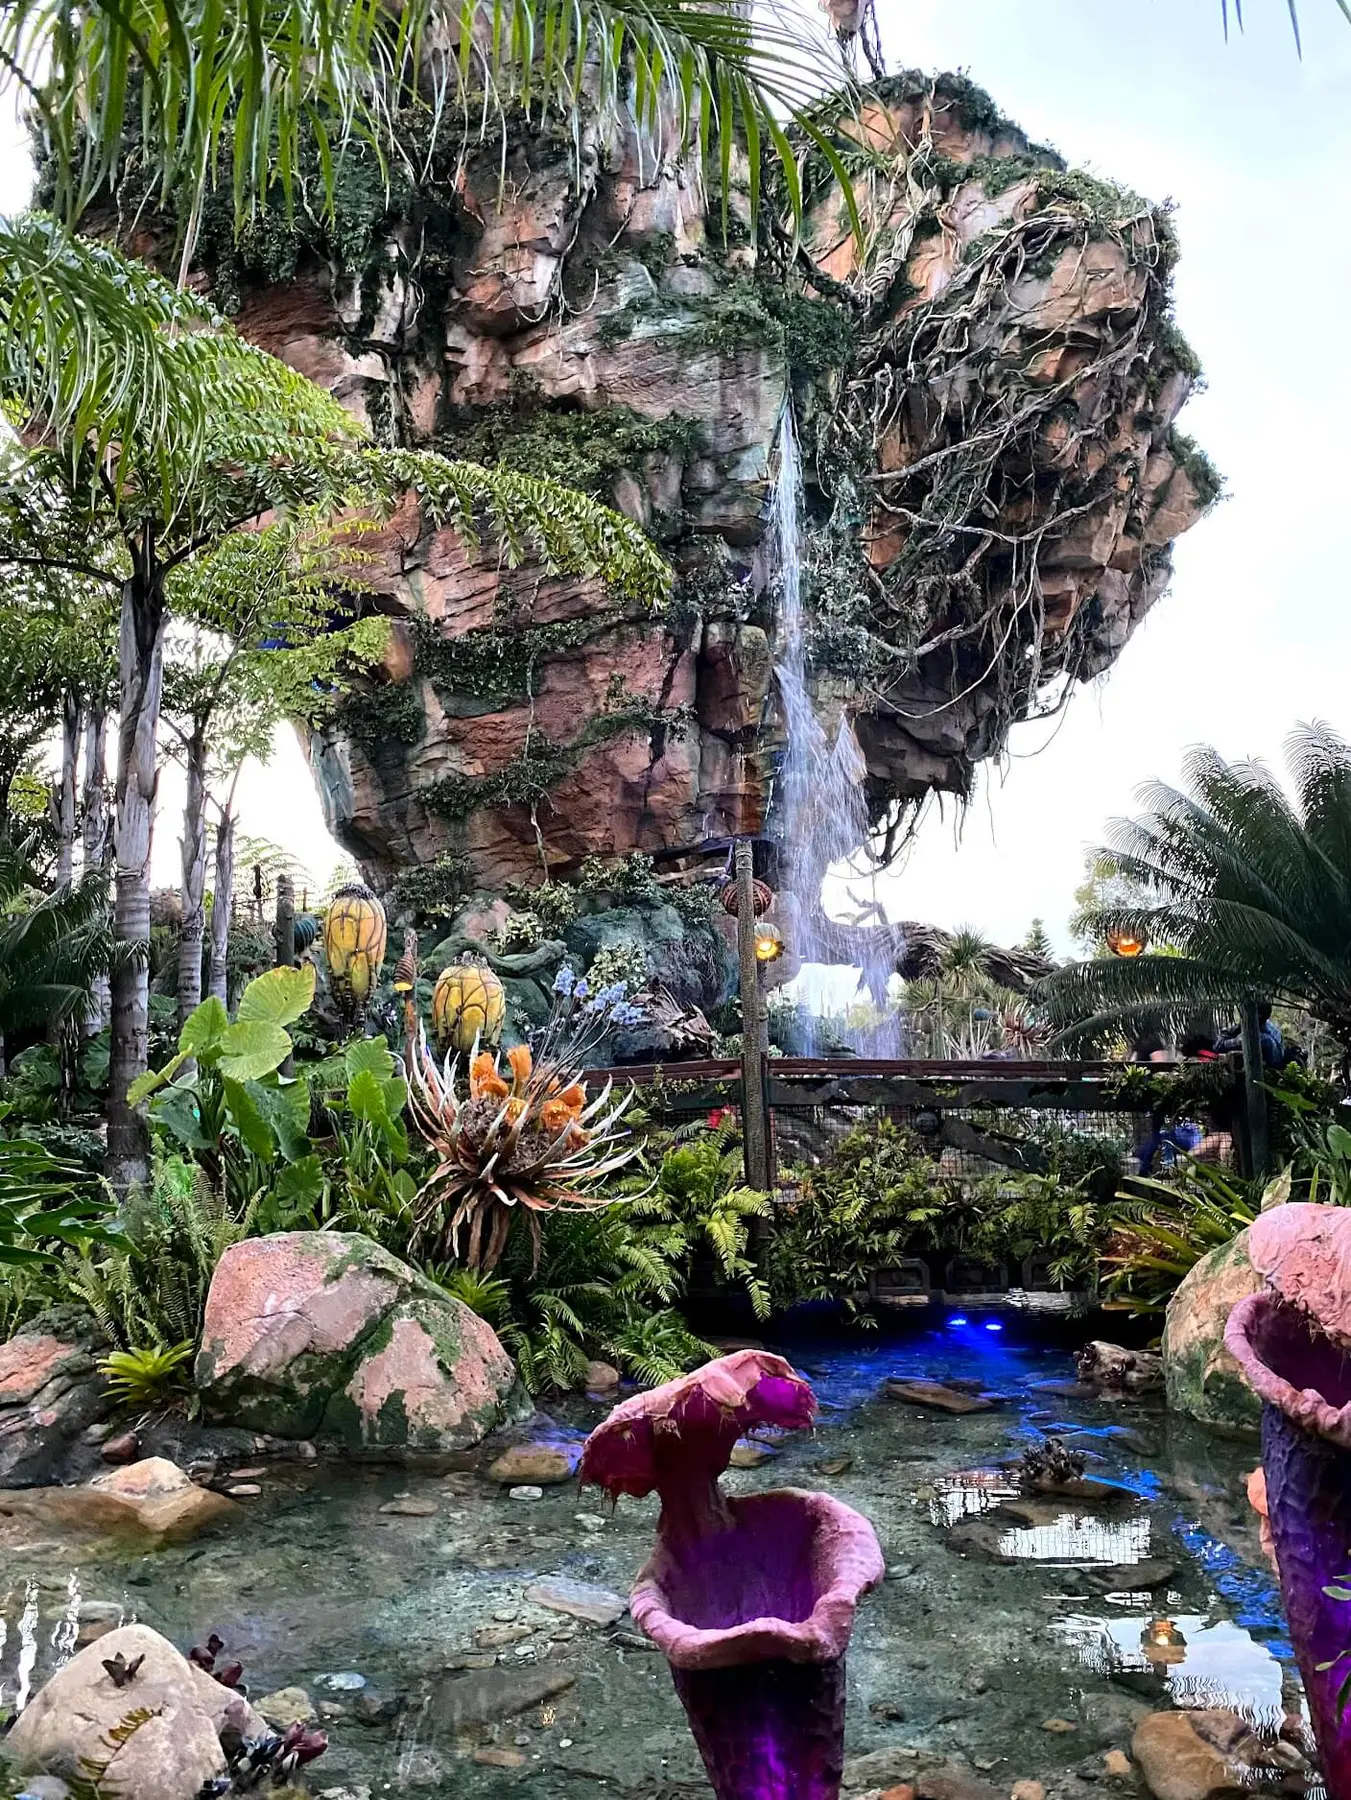
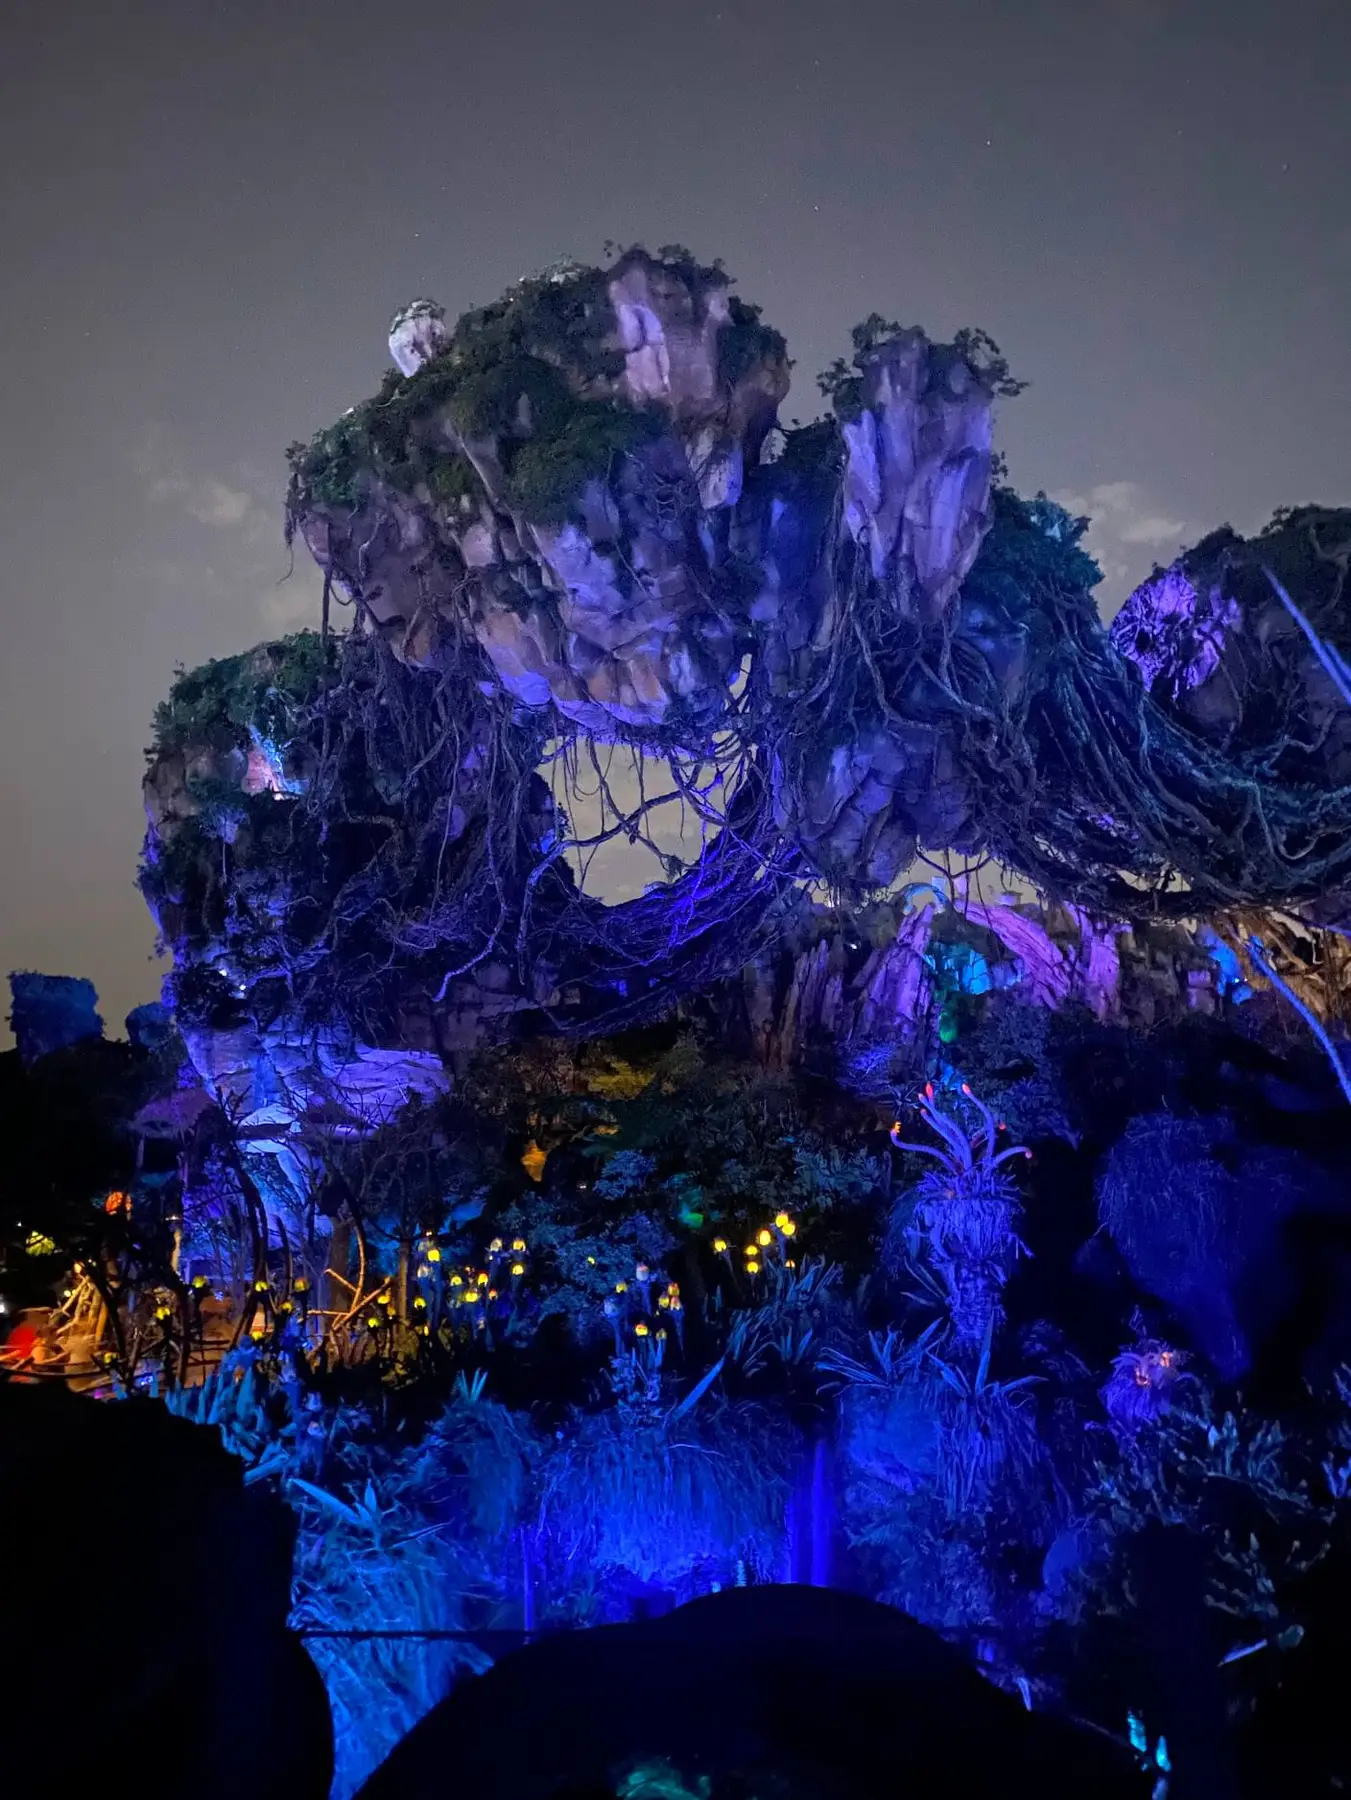
Animal Kingdom is an awesome park for families as it combines animals, attractions, and shows. It’s a beautiful park with lush landscaping and theming and has my favorite land in all of Disney World – Pandora.
Information and Preparation:
- Animal Kingdom is more than rides and more than a zoo – it combines great attractions, animal exhibits, an incredible safari tour, awesome shows, great restaurants, and beautiful landscaping. Some people will tell you to skip Animal Kingdom but it’s one of our families favorites! It is usually a more relaxing day than other Disney parks.
- Animal Kingdom is less crowded than other Disney World parks, but this doesn’t mean there won’t be long lines. There are fewer big attractions so those can still get long lines.
- This is a huge, spread-out park that will require a lot of walking.
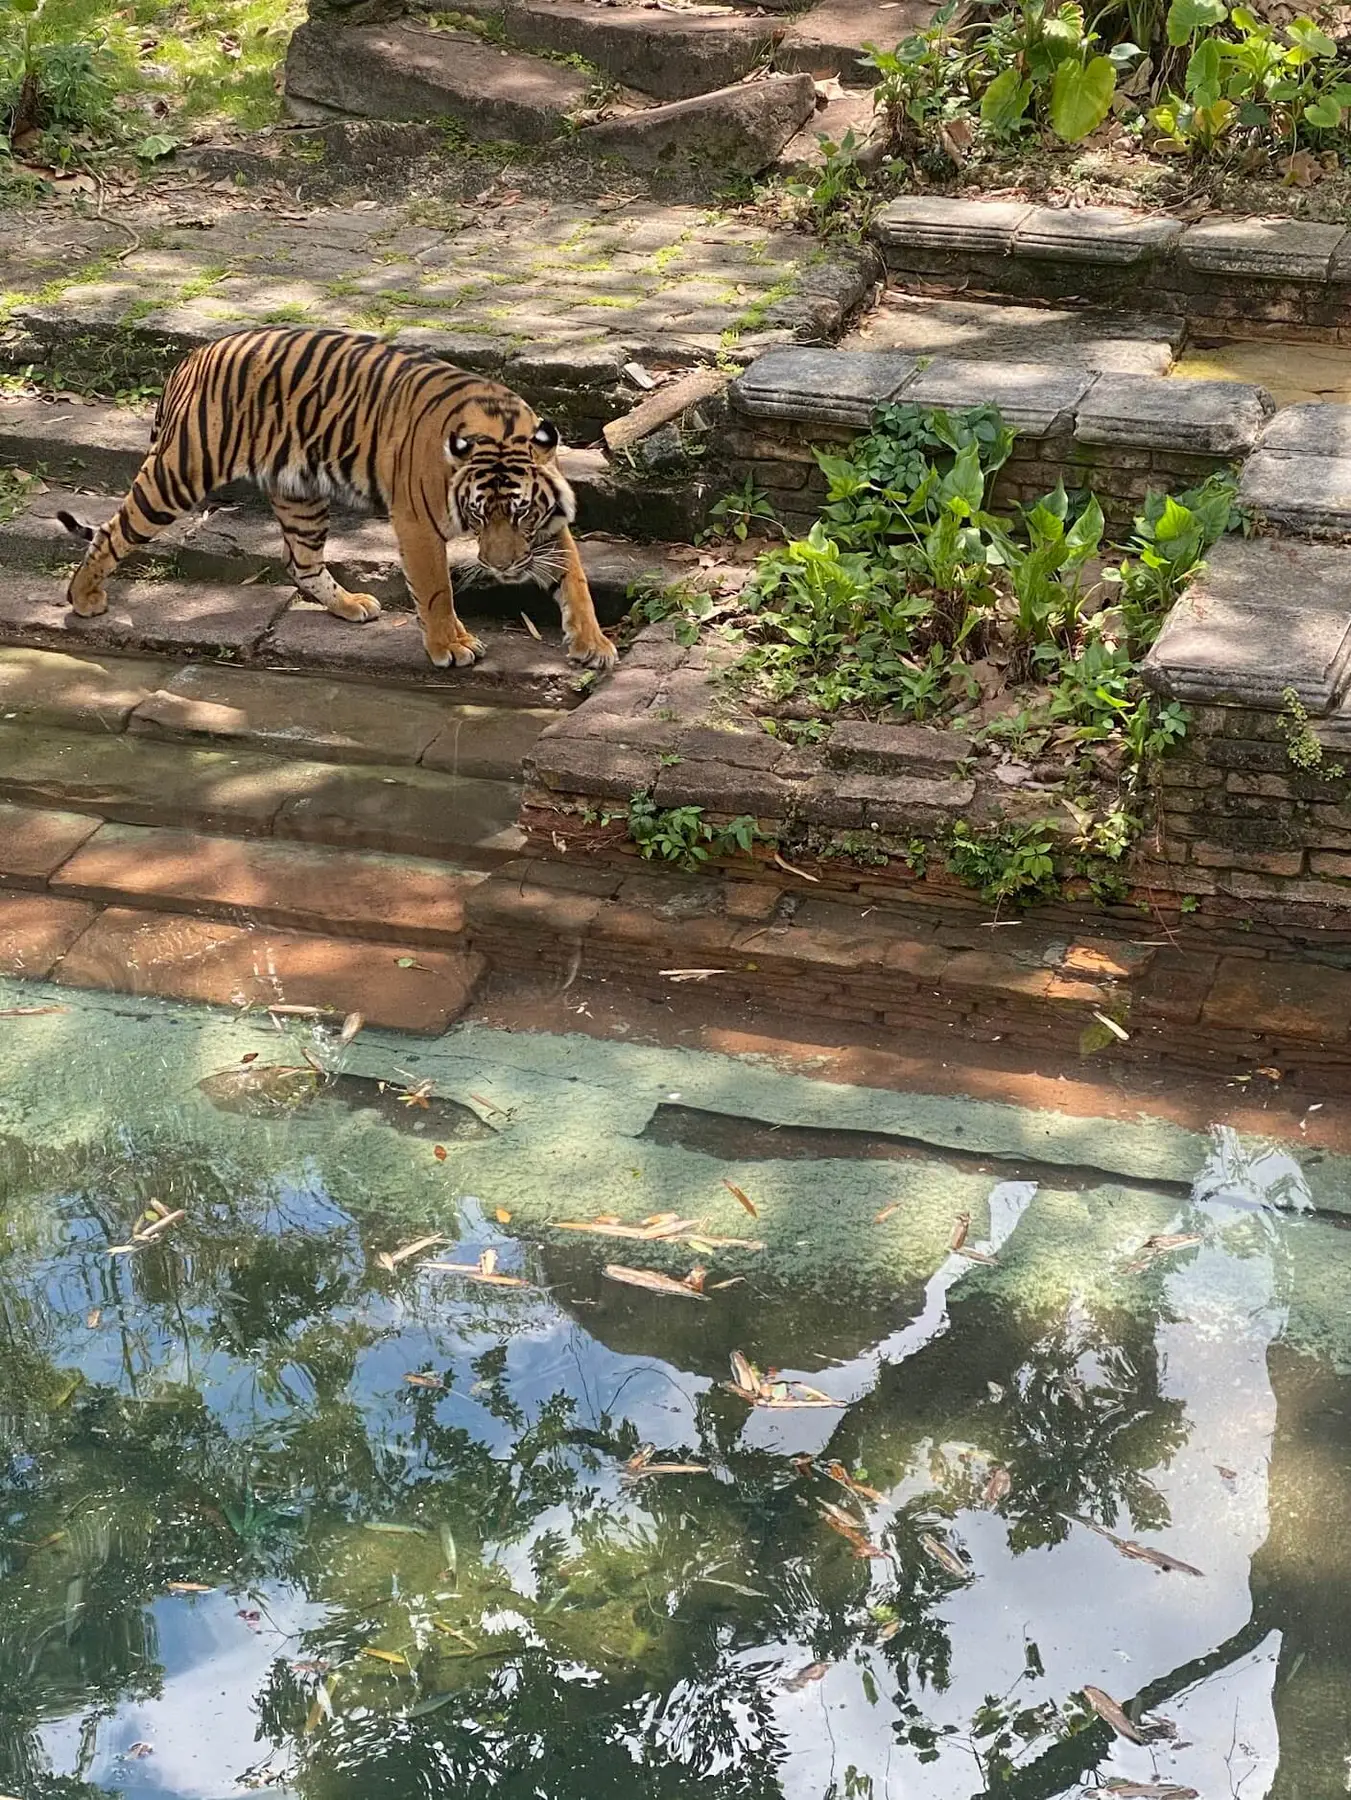
- Don’t forget to explore the animal trails and appreciate the beautiful landscaping of this park. It’s truly beautiful! Enjoying the animals and ambiance are part of what makes this park more relaxed than other Disney World parks.
- The hours at this park are usually shorter than others. Typical hours are 8am to 6 or 7pm.
What Day Within Your Vacation:
If you’ll be visiting Animal Kingdom as part of a multi-day trip to Disney World, I recommend visiting Animal Kingdom on your first full day. I recommend this for several reasons:
- This park is best accomplished by getting up early and arriving before or soon after the park opens. On day 1 of your trip you’ll still have enough energy to get up early!
- Animal Kingdom is the easiest Disney World park to navigate since it has fewer major attractions. It can take a little while to get into your theme park zone and feel like your family is used to the fun chaos. It can also take a while to get used to navigating the My Disney Experience App. This is a great park to start learning how to use the app and get your kids used to the flow of waiting in line, doing something fun, walking, waiting again – but without it being high stakes. It doesn’t require Lightning Lanes to have fun (on most days) so you can do the park in a more natural way with less stress. Perfect for day 1.
- This park does not have hard-to-get dining reservations. Some restaurants at Disney World are hard to get reservations for, and because your window for booking reservations opens up for your entire trip 60 days before you arrive, putting parks with hard-to-get reservations further out in your trip makes them easier to get. So if you have your heart set on Space 220 in Epcot, you most likely won’t be able to book it for Day 1 of your trip, but Day 6 will probably have plenty available.
- There is less need for Lightning Lanes at this park, and if you do decide to purchase it there will be plenty of inventory to get the reservations you want at either the 7 or 3 day booking window. At other parks with super popular tier 1 attractions, you’ll have a better chance of getting the attractions you want at the times you want if they are further out in your trip, since you can book for the entire length of your trip at either 7 days (for Disney Resort guests) or 3 days before you check-in.
I used to say to always put Animal Kingdom on a weekend and leave the other parks for weekdays, but lately, that seems to be less and less the case. Check out a crowd calendar to help predict what day may be best, but I think more important than the day of the week is the day in your trip, as described above.
Animal Kingdom can seem hotter than the other Disney World parks, so I recommend going when it’s cooler, or at least not crazy hot – ideally October-March.
You can have great meals at Animal Kingdom without doing a table-service restaurant. But it can also be really nice to have a mid-day break with a nice sit-down meal.
How to get an Advanced Dining Reservation:
Dining reservations open at 6am EST, 60 days in advance of the day you want to dine OR 60 days before you check in to your Walt Disney World Resort. This is a huge benefit for resort guests because you can book all your dining reservations before they open to everyone else. This is the easiest way to get hard-to-get reservations.
On the morning your window opens, use a desktop/laptop instead of the mobile app. Have a browser tab open for each of the restaurants you’re trying to book on the Walt Disney World website. Order your tabs in order of hardest to get to easiest to get and go through each tab to try to book the restaurant for the day you want. You’ll need to already know which day you want for each restaurant and approximate times so you can move quickly and not waste time. You can always adjust a reservation later if you change your mind and you can cancel up to 2 hours before your reservation time.
If you missed the 60 day window or the restaurant you want isn’t available, start checking for reservations closer to the date you want, especially the night before or the morning of the date you want. People cancel reservations all the time and you might get lucky!
Fore more detailed information on making Advanced Dining Reservations, including screenshots, please see my post about How to Get the Best Advanced Dining Reservations in Disney World.
Top restaurant recommendation for families in Animal Kingdom: Tusker House
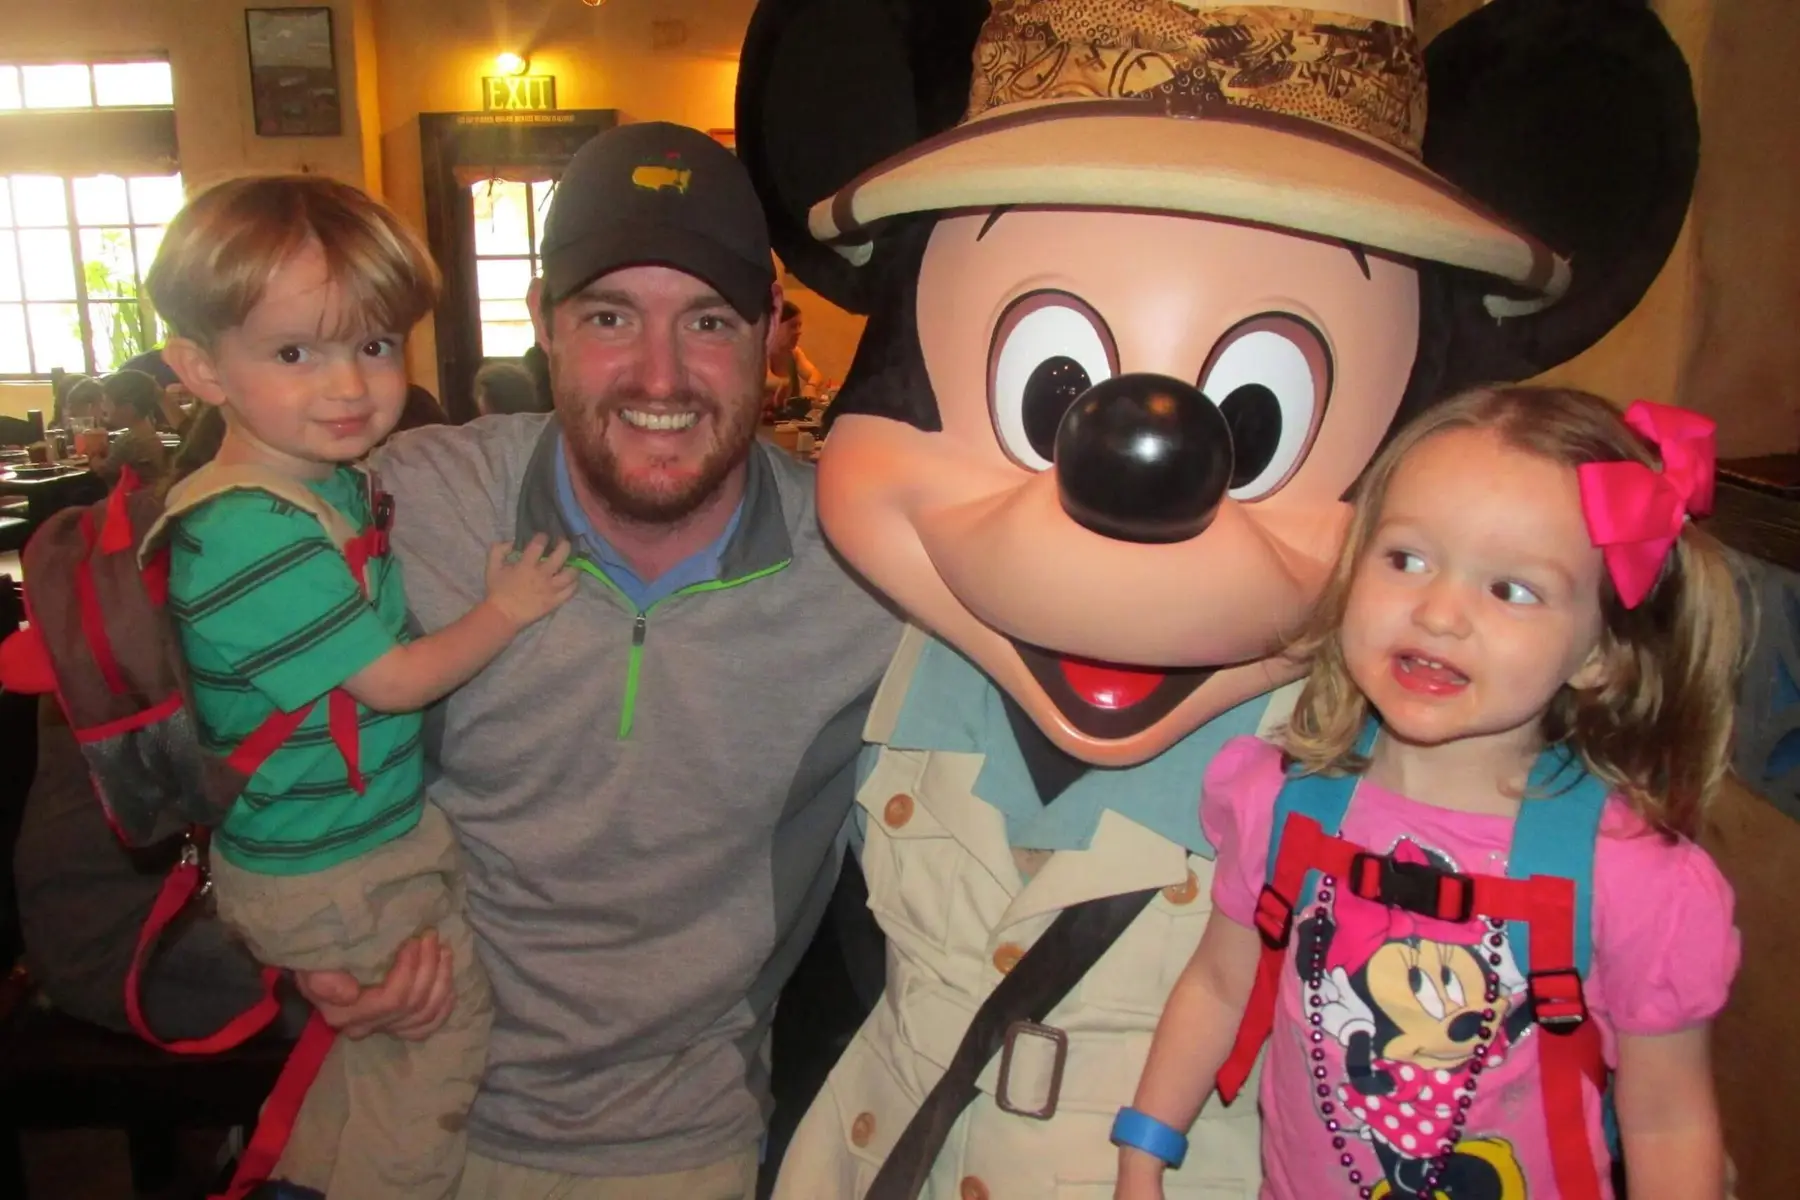
The Tusker House is located in the Africa section and features a buffet of African-inspired dishes and classic kid favorites. It’s a character meal featuring Donald, Daisy, Mickey, and Goofy (yes it’s missing Minnie) and they are all dressed in safari outfits. Like most character meals, the characters come to your table to interact with you and get hugs and autographs. You are guaranteed to see all the characters during your meal and sometimes more than once!
The Tusker House is a great chance to meet characters without having to stand in line to meet them, and the food selection in the buffet is quite good. The downside to a buffet is you have to leave your table to get food and often with small kids this means multiple trips to the buffet as you help each kid individually and you have to keep an eye on the characters to make sure you aren’t up at the buffet when they stop by your table. The other downside is the cost. Like most character buffets, this one costs $59 per adult and $38 per kid.
Time to Aim for:
I don’t recommend breakfast because the earliest breakfast time offered is usually 1 hour before the park opens. You don’t want to rush your expensive character meal so that means you’re probably exiting the restaurant a full hour after resort guests have been in the park thanks to early entry. So you missed the best hour of the day for riding rides without long lines. There used to be a good strategy around doing an early dining reservation and then being one of the first in line once the park opened, but that doesn’t exist anymore.
Great question! It has a few answers:
Are you visiting on President’s Day weekend, the week between Christmas and New Years, Spring Break time or any date that is listed as heavy crowds on Disney crowd calendars?
Then yes, it will help save you a good amount of time in lines. I would use one of the plans below that utilizes Lightning Lanes.
Are you visiting on any other day of the year?
Then no, I personally don’t think the cost is worth it for the amount of time you will save. Especially if you plan to spend the full day at Animal Kingdom and aren’t trying to hop to another park. Not using Lightning Lanes can mean a few longer lines, but also usually means less stress, less looking at your phone, and less crisscrossing the park (and this park is big).
Are you planning to park hop (visit Animal Kingdom AND another park(s) in the same day)?
It could be worth it to buy Lightning Lane Multipass. You could book 3 attractions at Animal Kingdom in the morning, then as you use those, start booking other Lightning Lanes at a different park in the evening. The one exception is if you’re hopping into Epcot as most of the best attractions will be gone by the time you try to start booking them.
Are you staying at a Disney resort and willing to get up early for Early Entry?
If yes – that’s great! You will be able to do Flight of Passage (the longest line in Animal Kingdom) with a short line without paying extra money.
If the answer is no, I would recommend buying an Individual Lightning Lane pass for Flight of Passage. This line alone can often surpass 90 minutes if you don’t hit it first thing in the morning. If you don’t want to spend extra money, your best bet is to save this as your last ride of the day and hop in about 5 minutes before the park closes.
Wait, what even are Lightning Lane passes?
Yeah, we should probably explain this a bit more…Lightning Lanes passes allow you to skip the regular queue and enter the line labeled “Lightning Lane” and have a typically shorter wait time – sometimes MUCH shorter. Lightning Lanes passes come in 2 forms –
- Lightning Lane Multi Pass – This pass let’s you choose up to 3 attractions or experiences in advance. Once you redeem a Lightning Lane, you can book another. If you stay at a Disney Resort, you can book purchase a LL Multi Pass and choose your 3 experiences 1 week in advance for the entire length of your trip. If you aren’t staying at a Disney Resort, you can purchase and choose your experiences 3 days in advance. At some parks, if you are only able to book your Multi Pass selections 3 days in advance, popular attractions will already be sold out.
- Lightning Lane Single Pass – This is a pass for one attraction only. These are done for the super popular attractions. At Animal Kingdom, this is Flight of Passage.
How much do Lightning Lane Passes cost?
The pricing varies based on date, park, and experience. Basically, the more popular the park or ride, or the more busy the date, the more it costs. If you’re visiting during a peak time and have a family of 5, the cost of doing Lightning Lanes passes every day can really add up. That’s why you may want to consider not purchasing them for every day of your trip, and one of the best parks to skip is Animal Kingdom.
What happened to Genie+? What happened to FastPass+?
Both of those are old forms of line-skipping passes that are no longer used. The new Lightning Lane Passes combine features of both of those old systems.
When your booking window opens at 7am (either 7 days or 3 days before your trip), you need to have a plan for which day you will visit each park, if you want to buy Lightning Lanes for each day, and which attractions you want to book.
For Animal Kingdom, these should be your priorities:
- Navi River Journey – Earliest time available (8-9am ideal)
- Kilimanjaro Safari – Next earliest time available (9-10am ideal)
- Expedition Everest – Mid-day – 11am-1pm (because crisscrossing in this park is hard and this is most likely when you’ll be near that attraction)
OR
Kali River Rapids – also mid-day. If it’s a hot time of year and you enjoy getting wet, choose this one because its line can get longer than Everest and it runs out of time slots faster than Everest when it’s hot. Even if you prefer Everest (which you should 😉 this could save you more time in line if you know you’ll want to do it.
Help! I didn’t get the time or attraction I wanted!
It’s ok! New times will pop up as people change their plans, especially on the day of. Go into the app and view your existing Lightning Lane return times, then touch “Modify” and it will present you with more times available for the same attraction, or other attractions available to book. Keep checking this page and pull down on the screen to refresh it. More times can pop up! If you see the time you want – tap it and confirm quickly!
Dress for the weather. In late fall through early spring that usually means dressing in layers. I like wearing leggings with a phone pocket so you have quick access to the item you’ll use most. Your warm layer should be something you can tie around your waste or put in a bag if it gets warm.
In hot weather, wear what will keep you cool such as tank tops, moisture wicking material, running shorts, moisture-wicking bras, ect.
If you or your kids have any Lion King, Avatar, Up, Pocahontas, or animal-themed clothing, this is the park to wear them! As long as they are comfortable.
Shoes: Wear what you can walk many miles in, because you will walk a lot at Animal Kingdom. For most, that means socks and a good pair of running/walking sneakers. Make sure your shoes are broken in before your trip.
If it’s a hot day and/or you plan on riding Kali River Rapids (white water ride), you may want to choose a comfortable strapped sandal such as Tevas or Chacos that will dry quickly and keep your feet cooler. But only if you can walk miles in them and not rub, even when your feet are sweaty.
Add mouse ears or hats, magic bands, and any Disney accessories to complete your outfit!
Smartphone
Magic Bands (not required but they are convenient. Learn more about them: https://disneyworld.disney.go.com/guest-services/magicband-plus/)
Stroller if needed (recommended for kids age 6 and under, even if they don’t use a stroller at home anymore) Ideally bring or rent one that reclines, has an under-compartment for storing things, and folds easily so you can bring it on a bus or pack it in your car.
A comfortable backpack or fanny pack packed with:
- Sunscreen (Face or body stick is great for putting on your family quickly on the go)
- External phone charger and correct chord (really important…trust me)
- Ponchos or packable rain gear (take out if there is no chance of rain)
- Band aids (regular and blister kind)
- Medicines (Ibuprofen, Dramamine, allergy, kids Tylenol, anything you might need that comes in a small pill or chewable form)
- Chafing Stick (helpful for thighs if wearing shorts, helpful for males on sweaty days)
- Ziplock bags (for putting your phones in on water rides)
- Sunglasses
- Lip balm with sunscreen
- Snacks (plenty of snacks to purchase in the parks, but if you have picky kids or young kids that need snacks to entertain them at times, bringing your own will be helpful!)
- In hot months, neck fans or portable fans are really helpful
- Suckers (obviously not required but if your kids are getting bored in a line or waiting for a show to begin, hand them a sucker for instant delight that helps pass the time)
- Water bottle(s) (They give out free water at quick service restaurants, but having a few water bottles you can fill on your own is helpful. Use ones that won’t leak if they’re knocked over or bumping around in a stroller and ones that will keep water cool on a hot day.)
- Stroller rain cover (no one wants to sit in a wet stroller)
- Baby/toddler gear if needed. (You know what you need…diapers, bottles, pacis, etc. If your little one will need to nap while at the park, bring something you can drape over the stroller and consider bringing a portable sound machine. This will create a good nap environment while in the parks while older kids and adults can still enjoy the fun. This is often a lot easier than going all the way back to your hotel for a nap. Even if your kid doesn’t usually nap in a stroller – they might once they’re Disney tired.)
You know what will work best for your child, but in my experience, trying to head back to your hotel from Animal Kingdom is not the easiest. Most hotels aren’t near the park so you’ll have to load up into a bus or car.
We would take time to walk out to the bus stop, wait for a bus, ride the bus, walk to our hotel room, and hope that we could get our little one down quickly, but usually our kid fell asleep on the bus ride, then woke up when it stopped and then is a ball of energy once we make it back to the hotel. Some people like to head to the pool for a break in the middle of the day, but the pool is not a break for kids – it will wear them out too. Then you’re trying to get everyone back to the park and stressing about how long it’s taking because you’re paying a lot per day for a park you’re not in. Also Animal Kingdom isn’t open as late so by the time you leave, nap, then come back, there won’t be much time left.
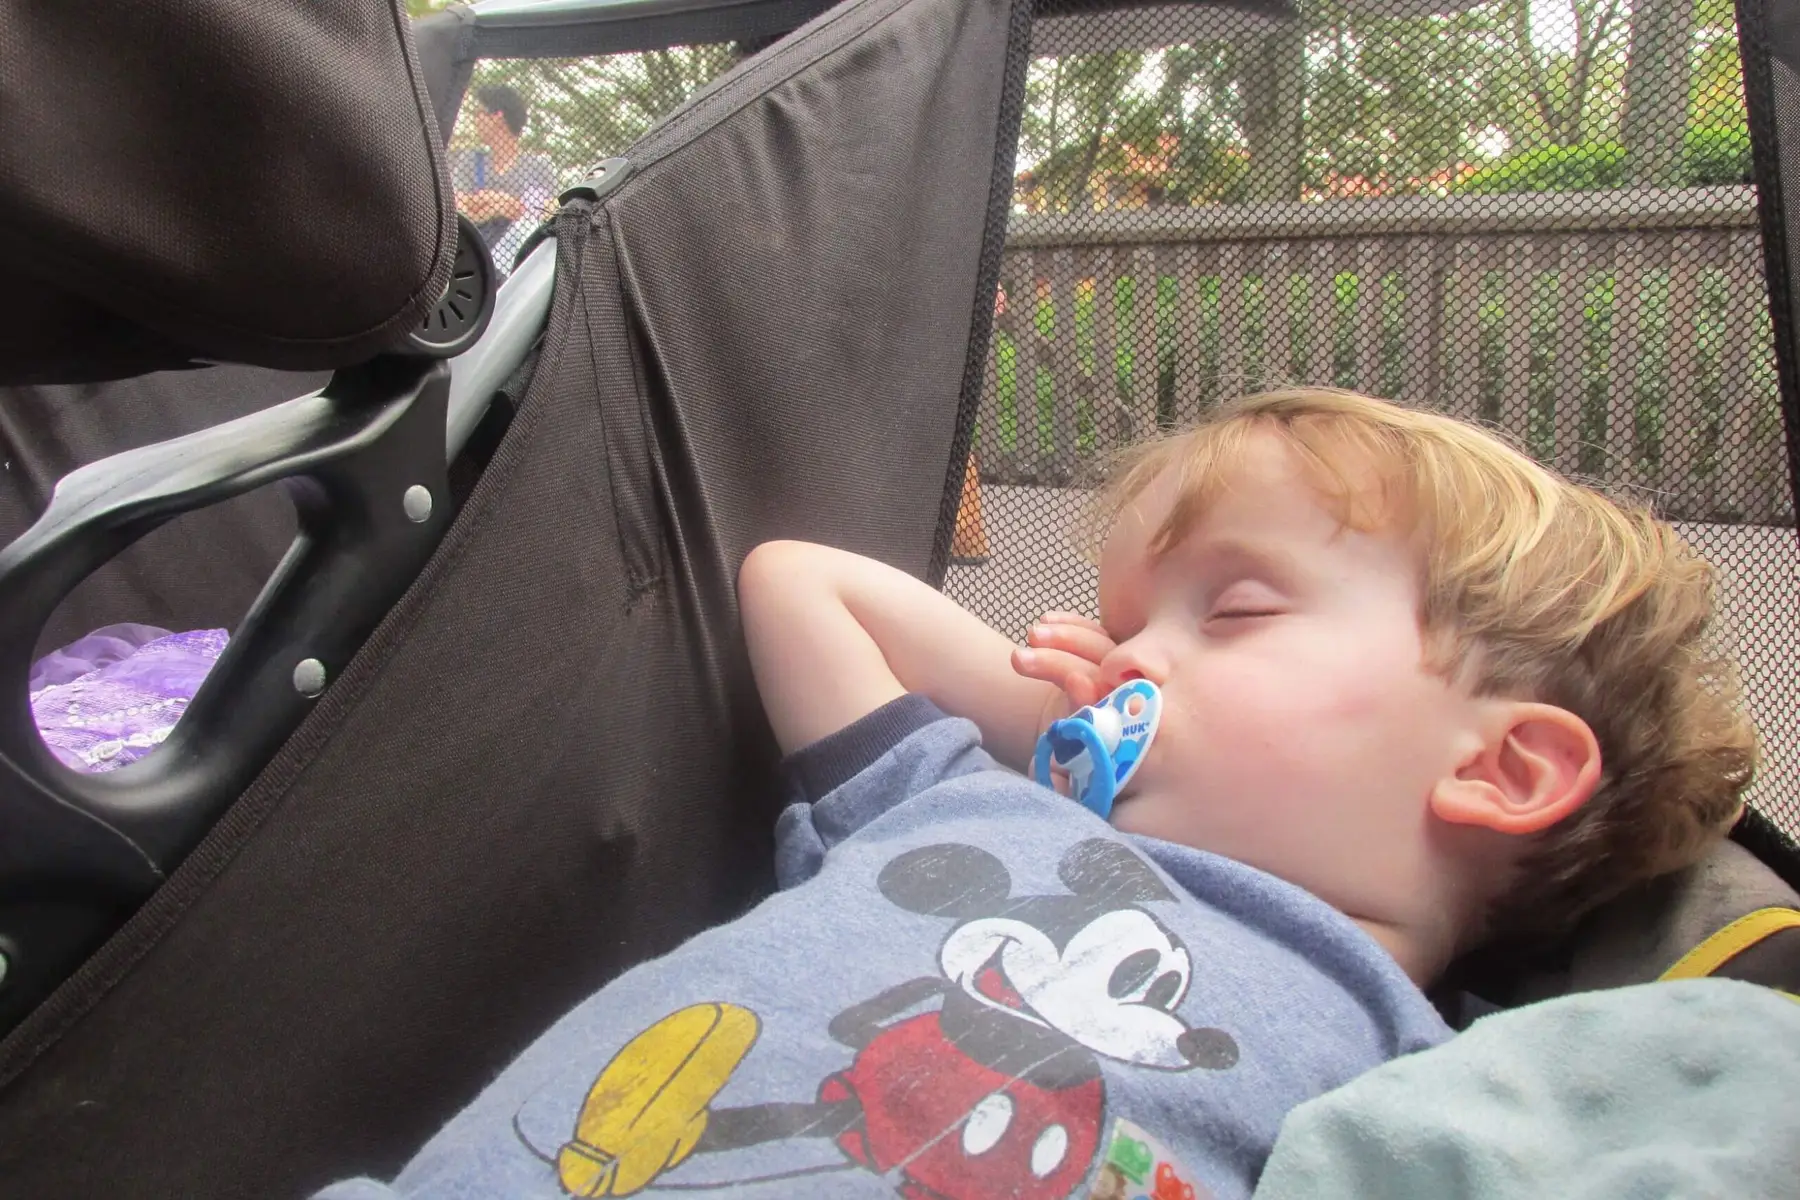
What we started doing instead was trying to get our napping-age kid(s) to nap in a stroller. Even if they don’t usually nap in a stroller, once they are Disney-tired, it will usually happen. Make sure you have a stroller that reclines and has a shade. You can drape a jacket or blanket over the stroller to make it a more peaceful environment. You can also buy and bring a portable white noise machine (not your phone, you constantly need that) but one like this, and hang it in the stroller. Then walk around and just like a car, it will lull them to sleep if they are tired.
Once they are asleep, adults and older children can take turns doing other things in the park. Or you can all just sit and relax with a beverage or snack and enjoy your surroundings.
I know taking time to relax at the hotel sounds more peaceful, but in our experience, it’s more time and stress than it’s worth at Animal Kingdom.
Use Rider Swap!
Disney will allow you to do a rider swap, where one adult and up to 2 children can wait in the queue and ride the attraction, while another adult waits outside of the queue with any children who aren’t tall enough. The younger children can do other attractions during this time so they don’t get bored. Then when the older kids and the other adult are done, the adult who waited can use the Lightning Lane to ride the attraction with a minimal wait time, and can also take up to two children with them so they don’t have to ride alone.
Sometimes, they will allow the kids who are tall enough to ride the attraction twice – once with each parent. This used to always work but they started cracking down on this more in recent years. It’s really up to the cast member at the queue entrance, so be nice and ask kindly! My older kids were actually a bit sad when our youngest got tall enough because they loved getting to do all the thrill rides twice.
Do keep in mind that utilizing rider swap will take more time. All our itineraries have approximate times to help you plan, but you will have to adjust for more time if doing rider swap.
To use rider swap:
Check in at the entrance of the attraction queue with a cast member and let them know you want to rider swap. They will scan the magic bands or tickets of the people who will be waiting. This basically puts a free Lightning Lane on your band/ticket. After the first group rides, the second group can enter through the Lightning Lane by scanning at the touch point.
Attractions with height requirements at Animal Kingdom:
- Avatar Flight of Passage – 44″
- Expedition Everest – 44″ (may to be too intense for some children even if they are tall enough)
- Kali River Rapids – 38″
- Dinosaur – 40″ (may be too scary for some children even if they are tall enough)
Yes! Follow the same process above (still check in with the cast member) but BOTH groups will enter through the Lightning Lane. This means the group waiting first won’t have to wait as long.
Choose a Touring Plan:
Animal Kingdom Full Day – No Early Entry
This touring plan is for families visiting on a low to moderate crowd day, not using Lightning Lane Multipass, and either not staying at a Disney Resort or not wanting to wake up early for Early Entry (includes Ligning Lane Single Pass).
Animal Kingdom with Little Kids
This itinerary is for families with kids under 44″ tall and does not include any attractions with height restrictions, but lots of other fun! No Lightning Lanes needed.
Animal Kingdom Half-Day Itinerary Using Lightning Lanes
Do you only have half a day to spend in Animal Kingdom? Do you want to hop to another park later in the day? This plan will help maximize your time using Lightning Lanes. Can be done with or without Early Entry.
Animal Kingdom Full Day Using Early Entry, No Lightning Lanes
This touring plan is for families with kids over 44″ tall, visiting on a low to moderate crowd day, not using Lightning Lanes, and making use of Early Entry which is available to Disney Resort guests.
Attraction Information:
This is one of my top 3 attractions in all of Disney World! This is a simulator ride that will make you feel like you are riding on the back of a banshee through the beautiful land of Pandora from the Avatar movies. I don’t like all simulator rides, but this one is smooth, does not make me nauseous, has air blowing on your face, and really feels real. I literally cried tears of joy the first time I rode this ride!
Things to know:
Height Requirement: At least 44″ tall. May not be able to accommodate some tall/large guests.
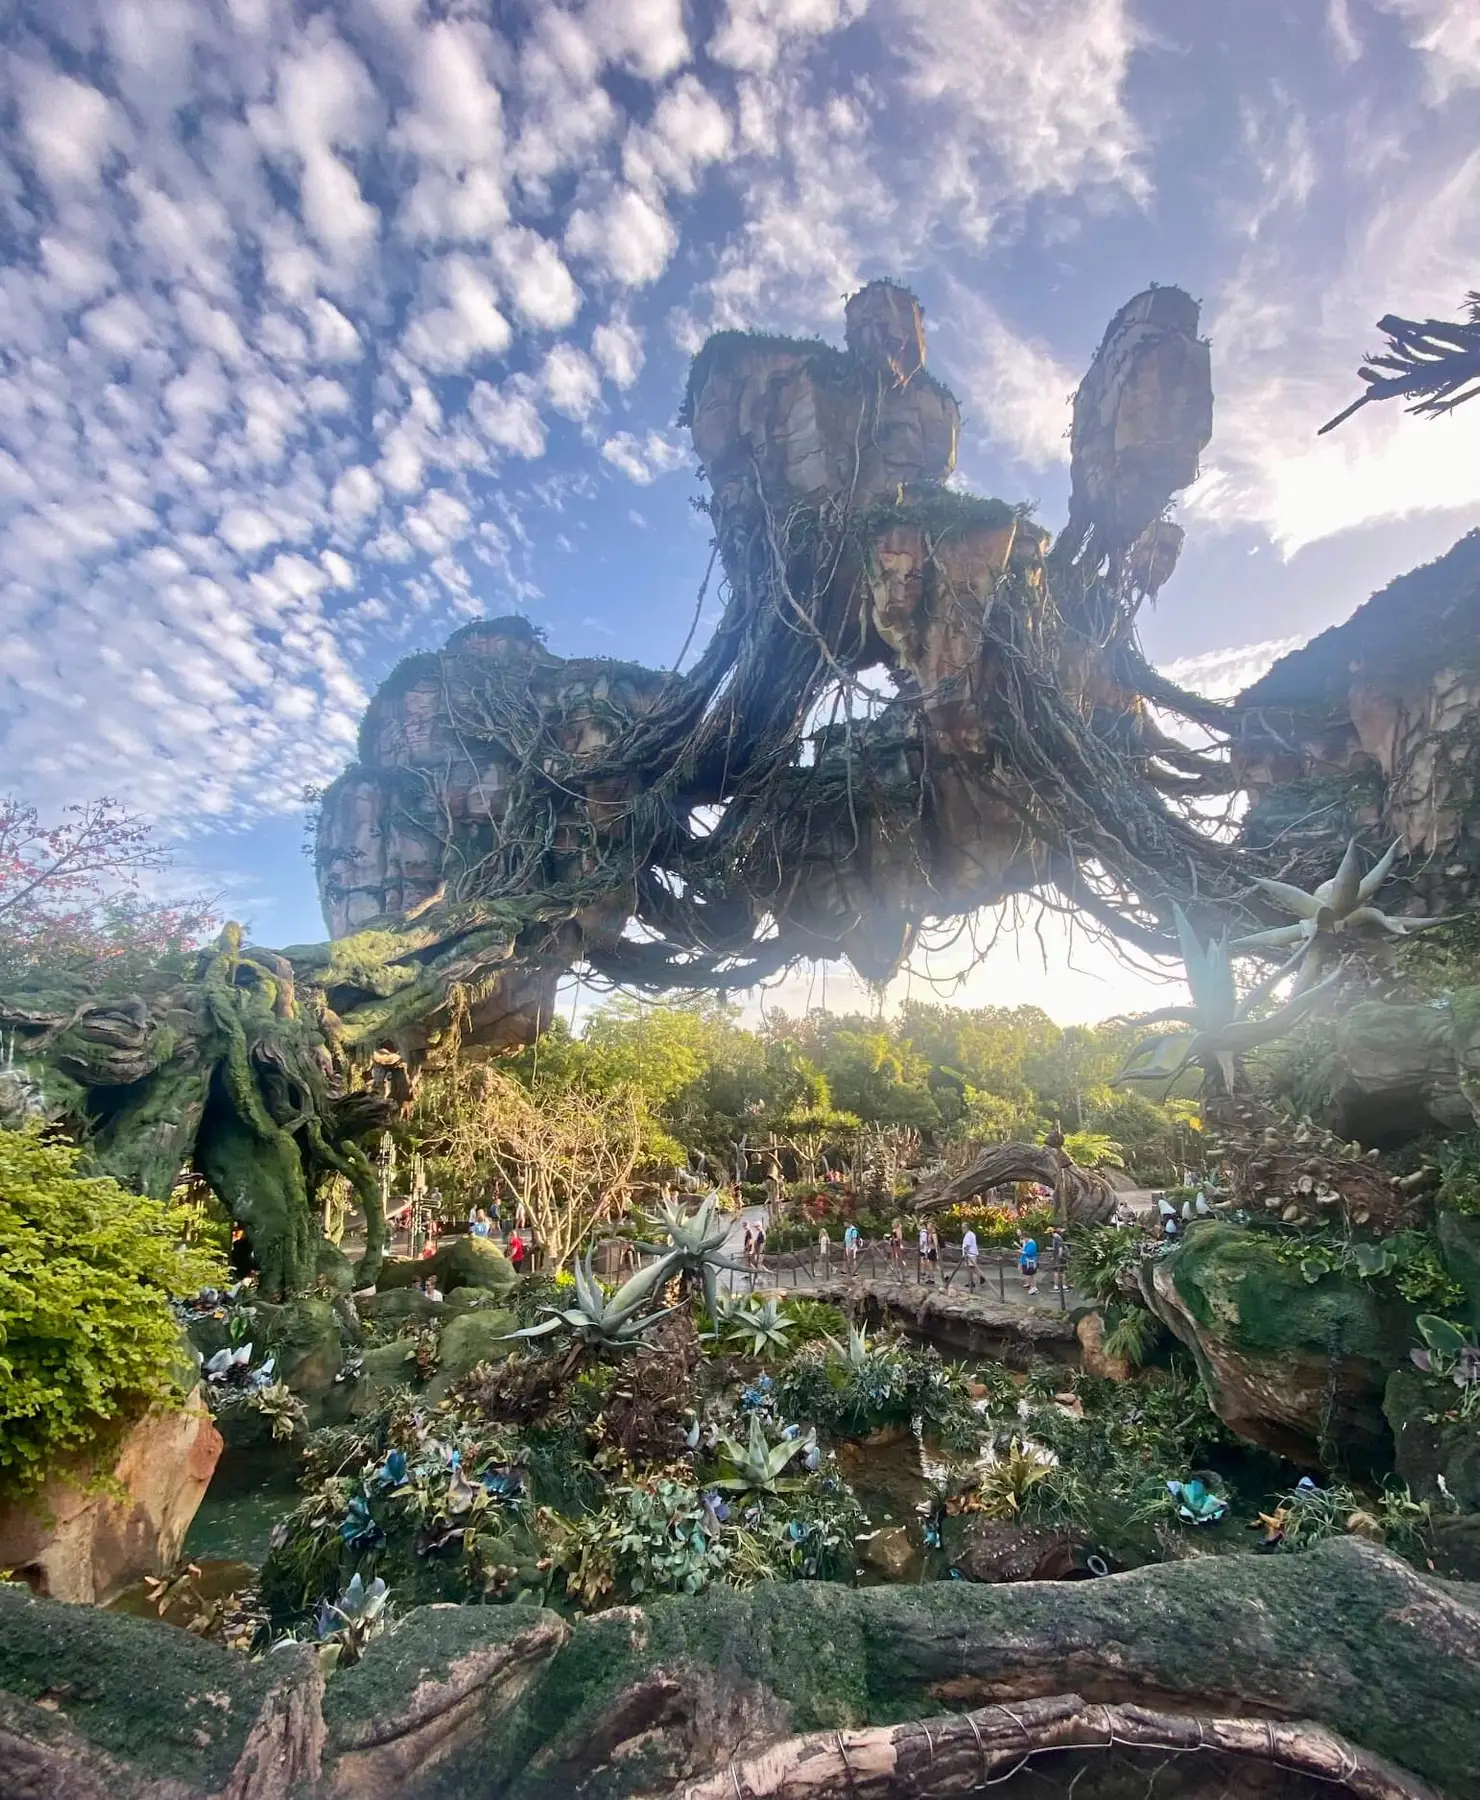
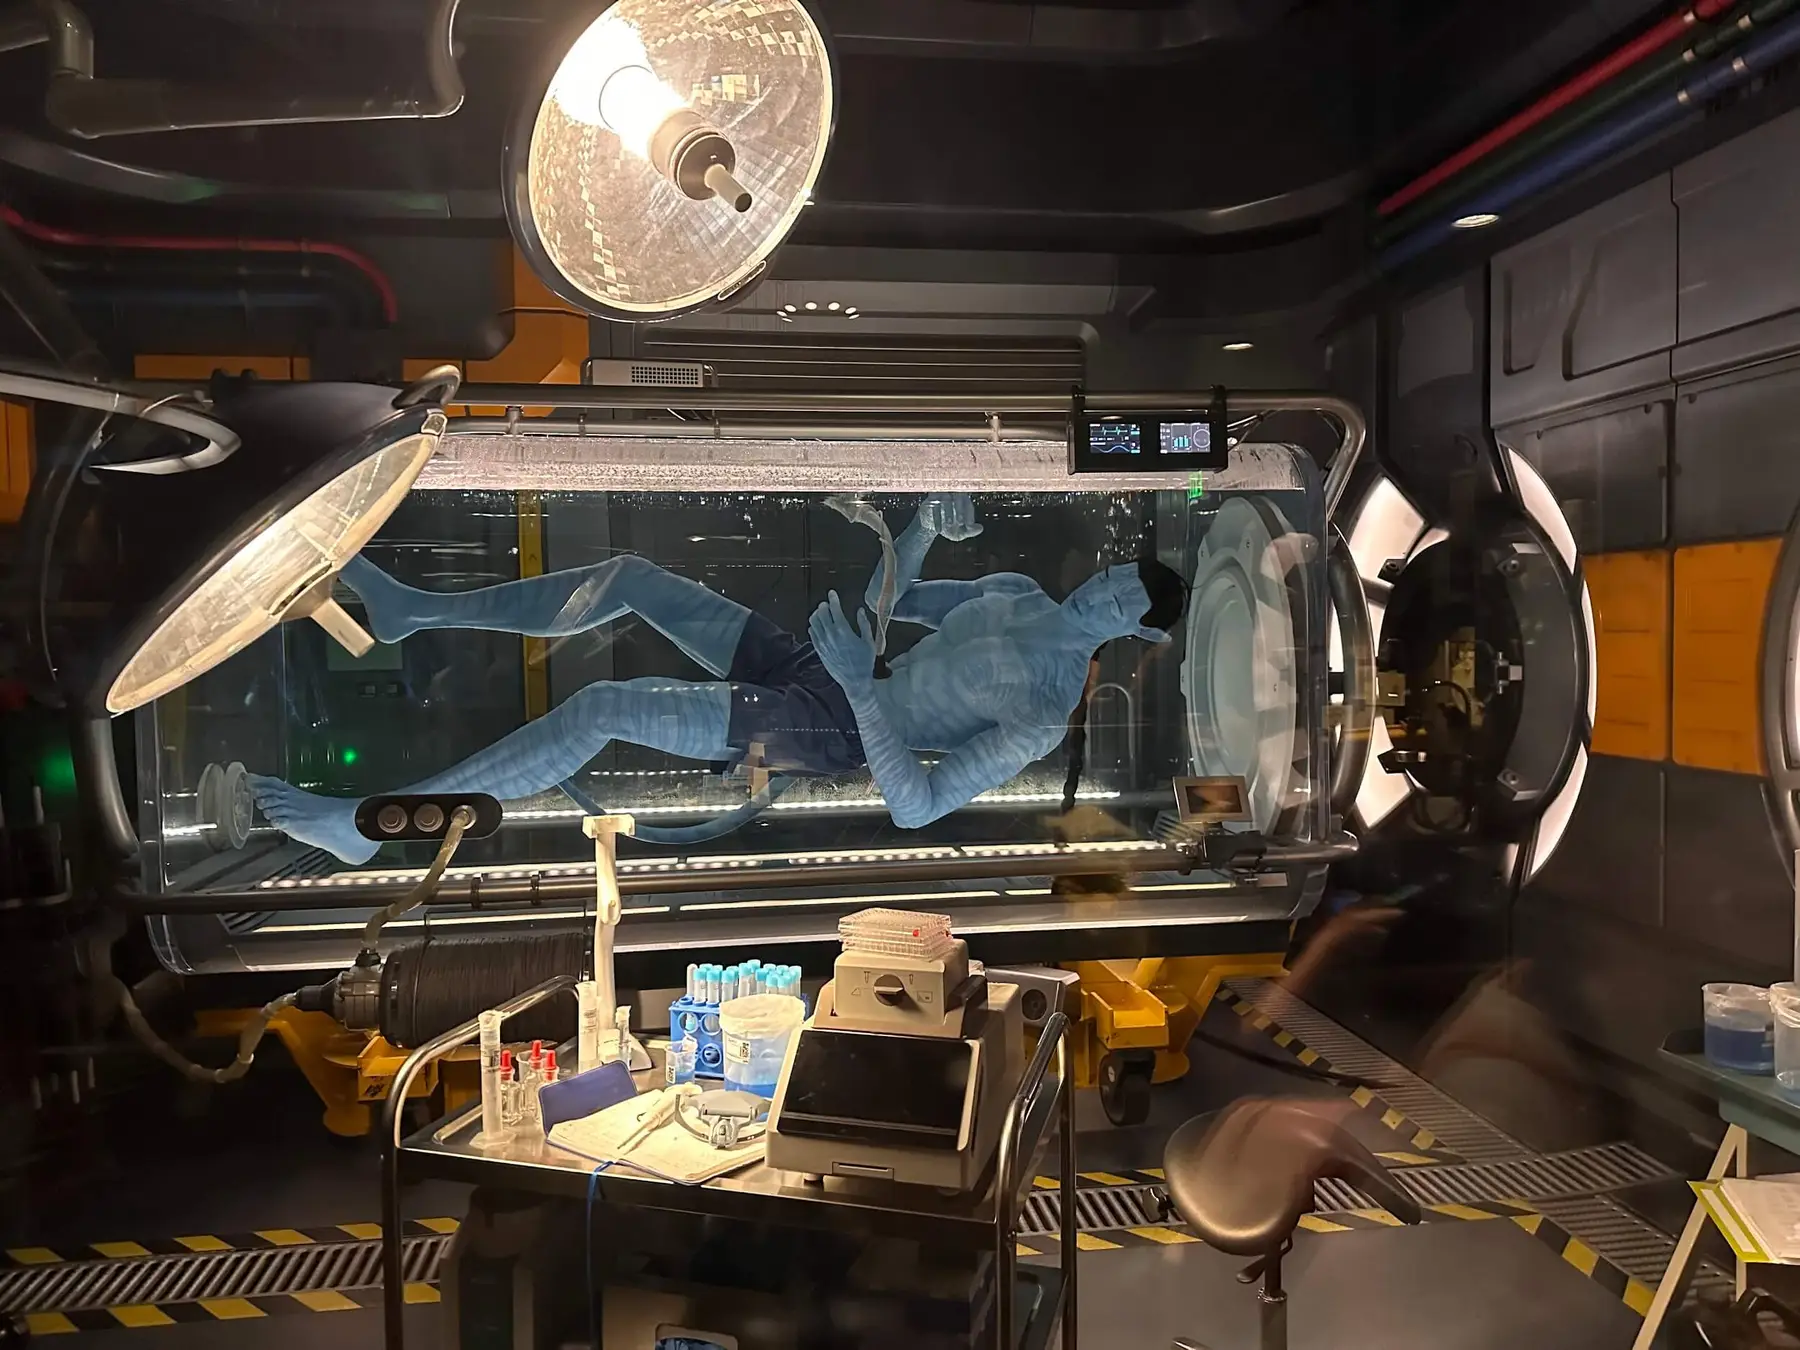
Queue: The queue is part of the experience! The first part is outdoors and provides you with gorgeous views of the land and the floating mountains and waterfalls. The second part takes you into the “human-built” buildings where you find the scientific labs. The second half is much less beautiful, but if you’ve seen the movies, you’ll know that the contrast is purposeful. A highlight of the queue is the life-size avatar in a liquid chamber.
Pre-show:
The preshow room lines everyone up on circles in a small room and plays an intro video. They also pretend to scan you to link you to an Avatar. I had a friend who’s child was scarred by this room. If you have a sensitive child, it may be good to remind them that it isn’t real, but it’s fun to play pretend at Disney World!
Seats and Glasses:
After the preshow you enter the next room that has the seats. You can show your things in bins in the room. The seats are like riding a motorcycle (one leg on each side) but you are leaning forward with your hands grasping handles in front of you. Once you’re in your seat, a back rest will move into place and can be a bit startling when it hits your back if you’re not expecting it. You will put on your glasses and wait for a bit with a screen on the front of your “bike” that shows you being connected to an Avatar. There will be a series of vibrations as you are “linked” to your Avatar which feels funny to some kids. Once the “flight” begins, you will feel your banshee “breathing” meaning you’ll feel the seat around your legs expand and contract a bit. It’s quite cool! You’ll also have wind blowing in your face to simulate flight and bonus – it helps avoid motion sickness!
Ride Length: 6 minutes
Dinosaur is a thrilling dark ride that takes you back in time on a mission to rescue a dinosaur before extinction. But you arrive just as a giant asteroid is hurtling toward Earth and you have to avoid lots of carnivorous predators, to catch the dinosaur, and get out before the asteroid hits.
You board a ride vehicle that has 3 rows of four seats. The vehicle goes along a track but also jerks and bucks around like a simulator vehicle. (It is similar to the Indiana Jones ride vehicle at Disneyland if you’re familiar with that.)
It is jerky, dark, loud, and has scary animatronic dinosaurs. My older kids (and myself) love it! But it is not a great attraction for younger kids, despite it’s only 40″ height requirement.
Things to Know:
Height Requirement: 40″
Queue: The queue starts outdoors but covered, then moves inside where you’ll see lots of large dinosaur fossils. You then go into a pre-show room where you’ll watch a video that sets up the story of the ride.
Ride time: 3 minutes
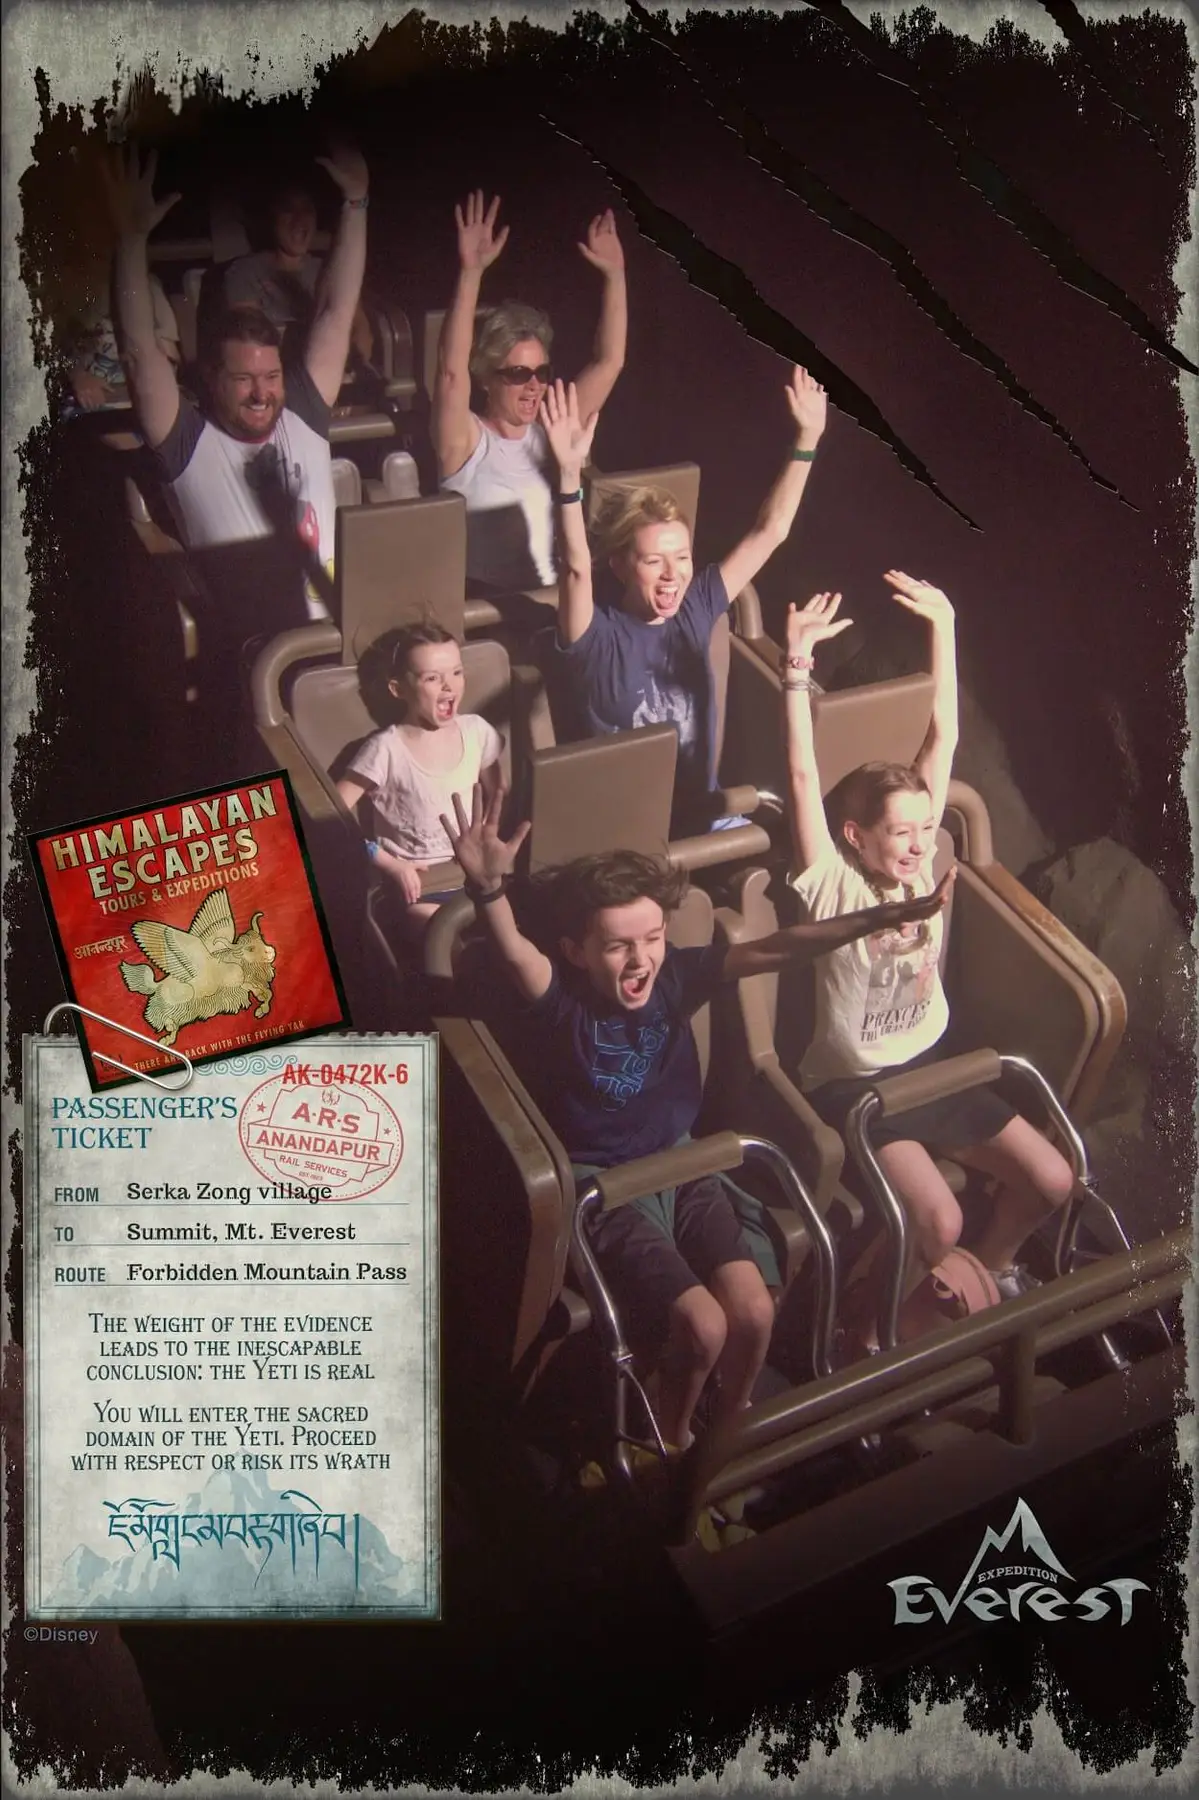
Expedition Everest is a fun family roller coaster that is more thrilling than Seven Dwarfs Mine Train and Big Thunder Mountain (at Magic Kingdom) and less thrilling than Rockin Rollercoaster (Hollywood Studios) and Guardians of the Gallaxy Cosmic Rewind (Epcot). I had one kid that at 44″ thought it was too intense, and another at 44″ that thought it was the best, so know your kid and give it a try when you think they’re ready!
The roller coaster has a bigger drop than other Disney coasters and has a part where the train stops, you see the shadow of a yeti breaking the track, and then you briefly go backwards. The roller coaster tells a story and leads you through a mountain and is absolutely beautiful. The attention to detail is second to none.
Things to know:
Height Requirement: At least 44″ tall. Rider swap available.
Queue: The queue is covered and sets up the story of the ride with beautiful details.
Ride Length: 6 minutes
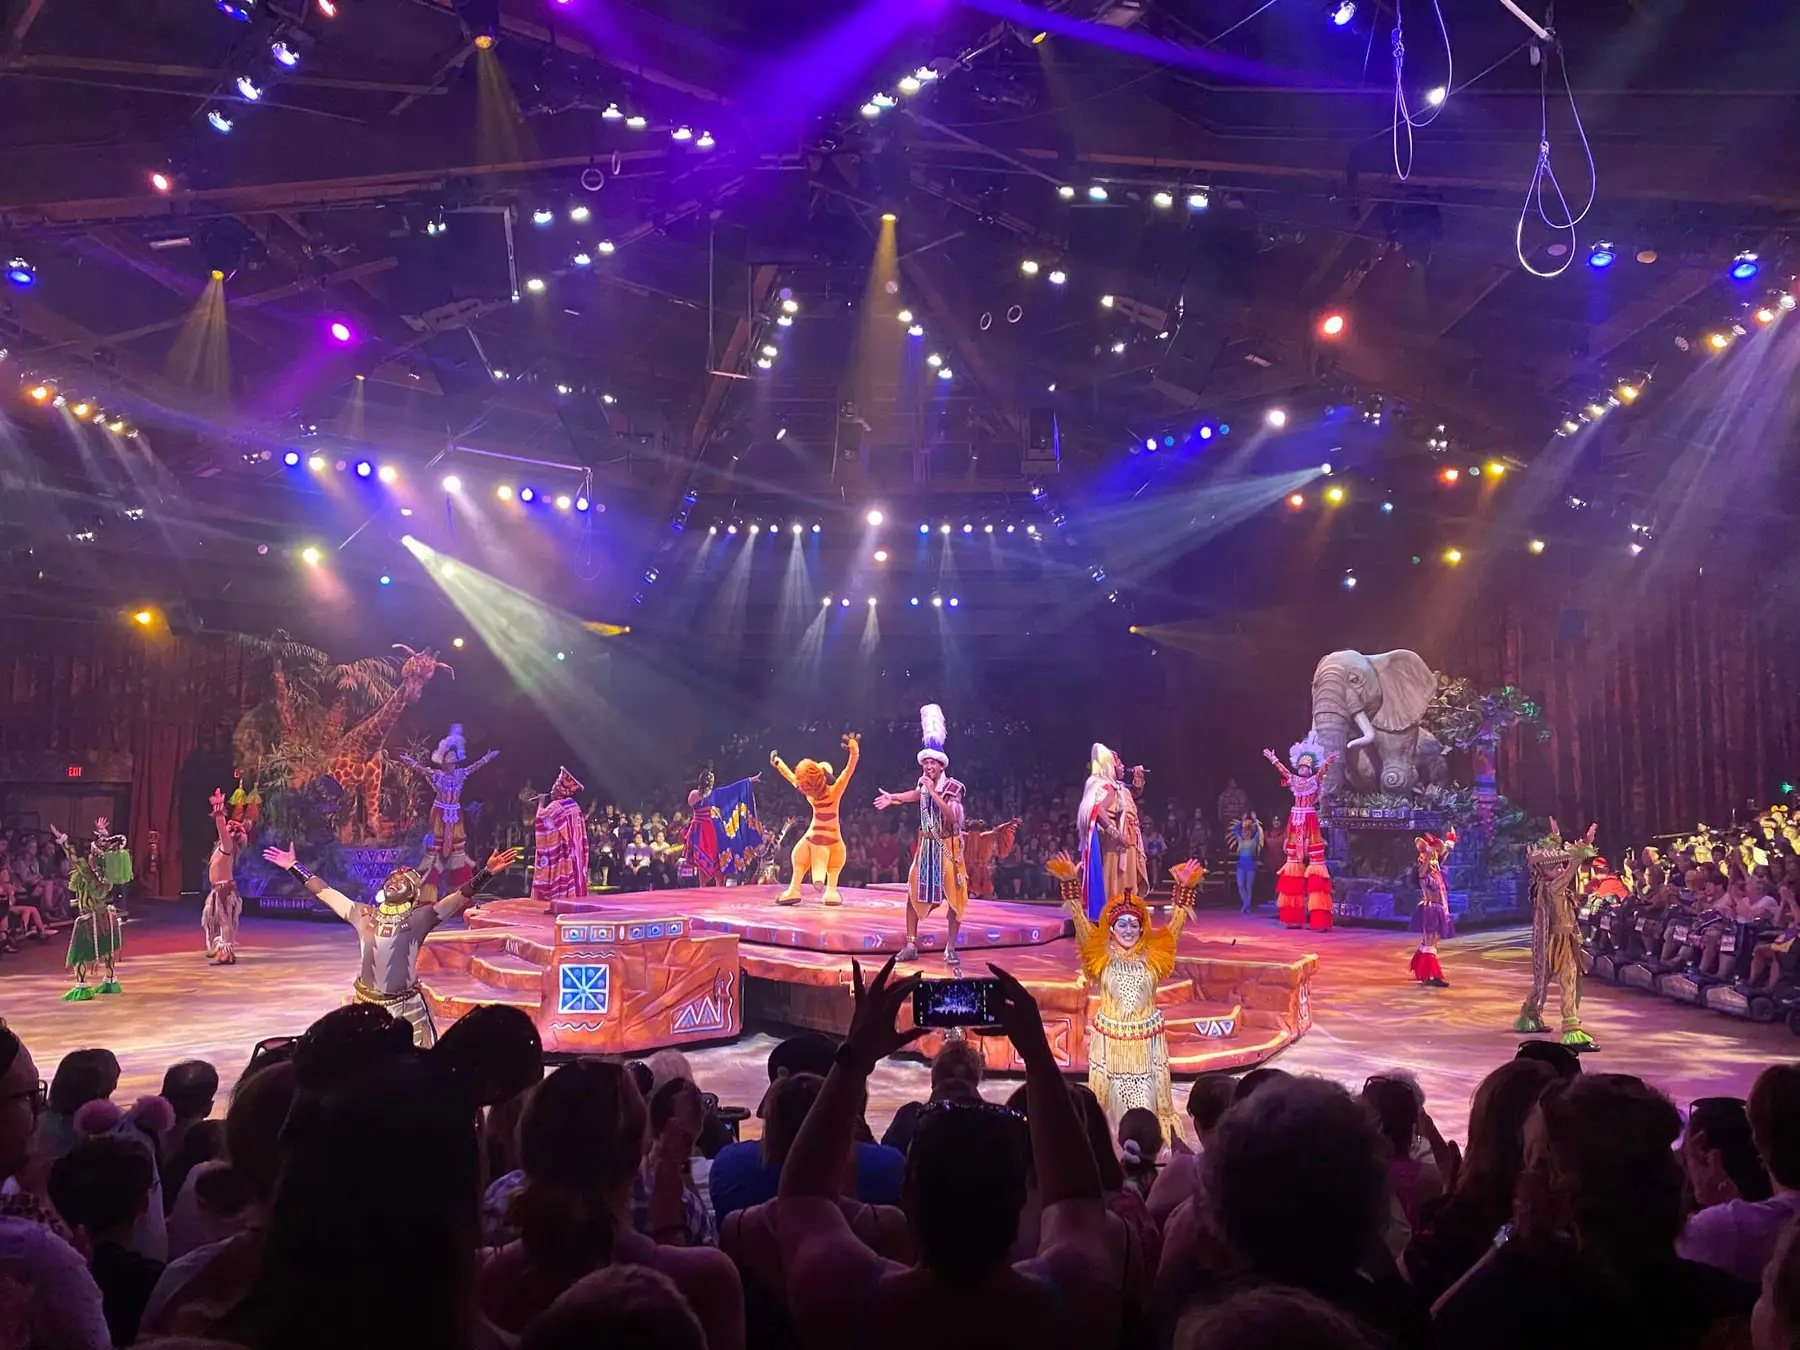
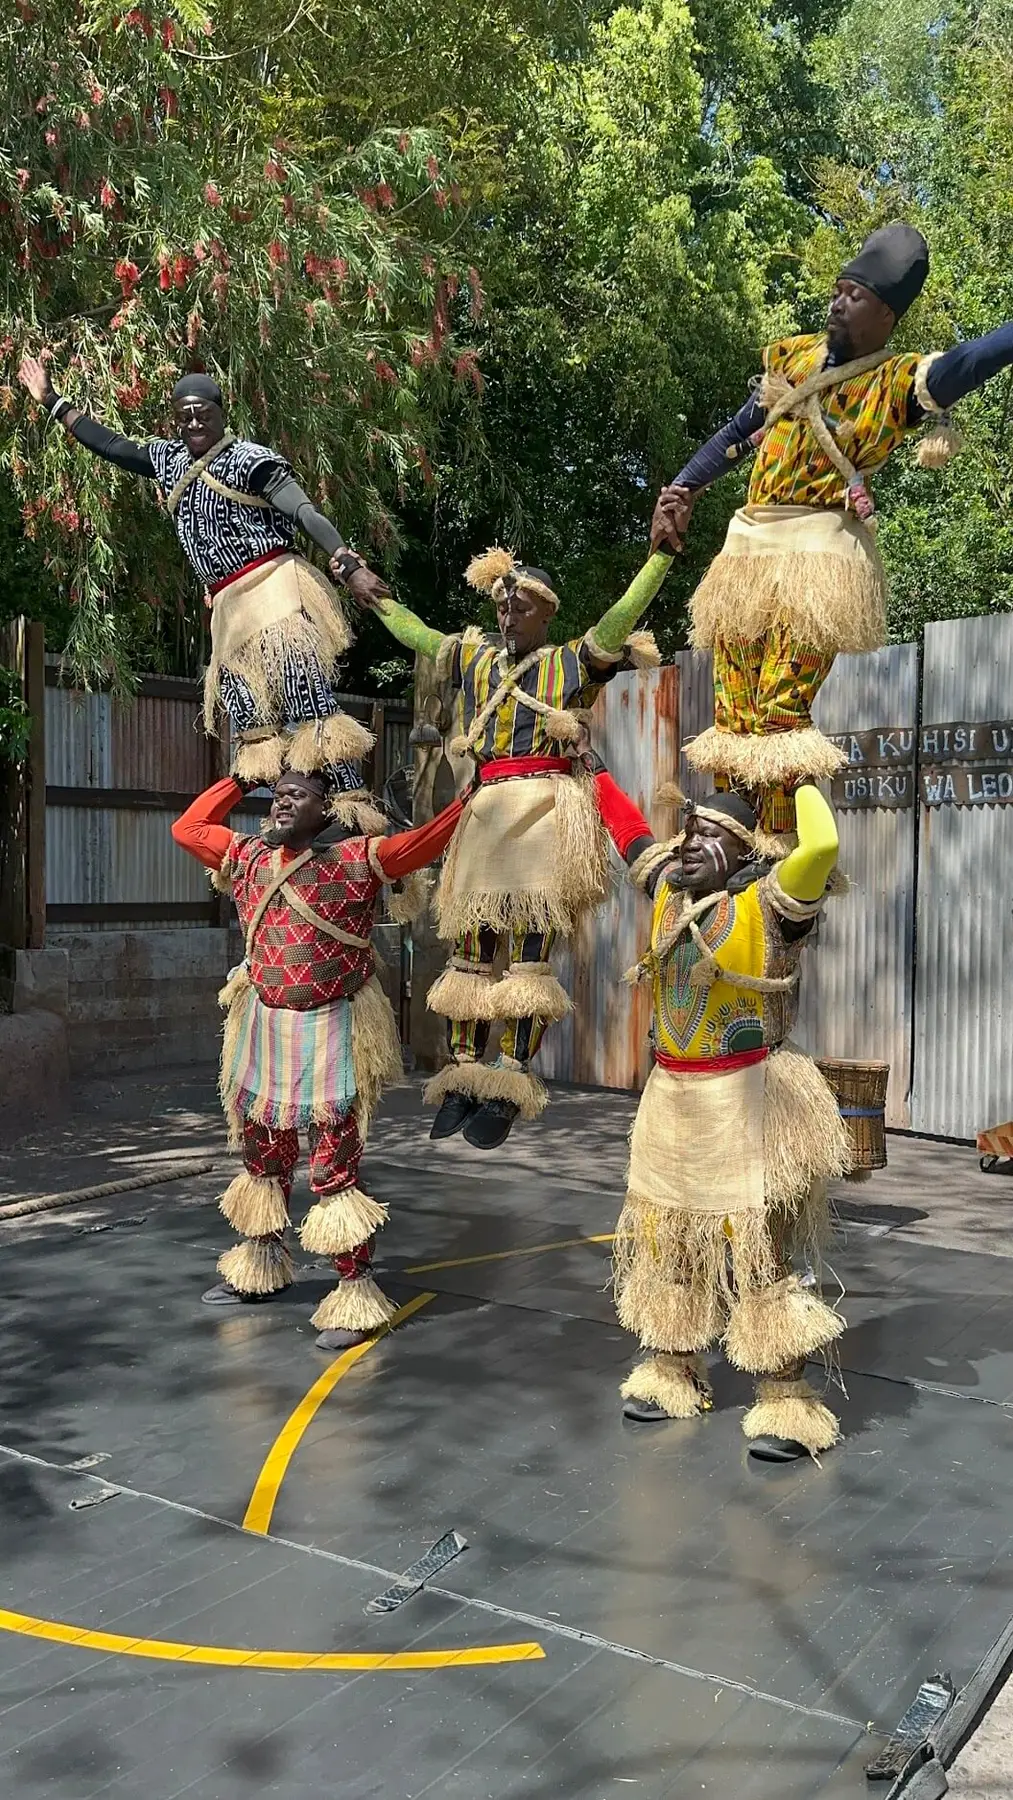
This is the best show in Walt Disney World! Even if you usually skip shows, try this one! It features great musical numbers from The Lion King, acrobatic acts, characters, and is a beautiful production!
There are four sets of bleachers with the show performed on the floor in the middle. If you have shorter kids, you will want to get in line for the show early to get the best seats as sitting in the back makes it harder to see.
Things to Know:
Queue: You queue up outside the theater and we recommend getting there 20-30 minutes before showtime. About 10-15 minutes before showtime they will start seating people inside the theater and cast member will direct you to a section. While you wait for the show to begin they will have cast members to entertain you and introduce you to your cheering section.
Show time: 30 minutes
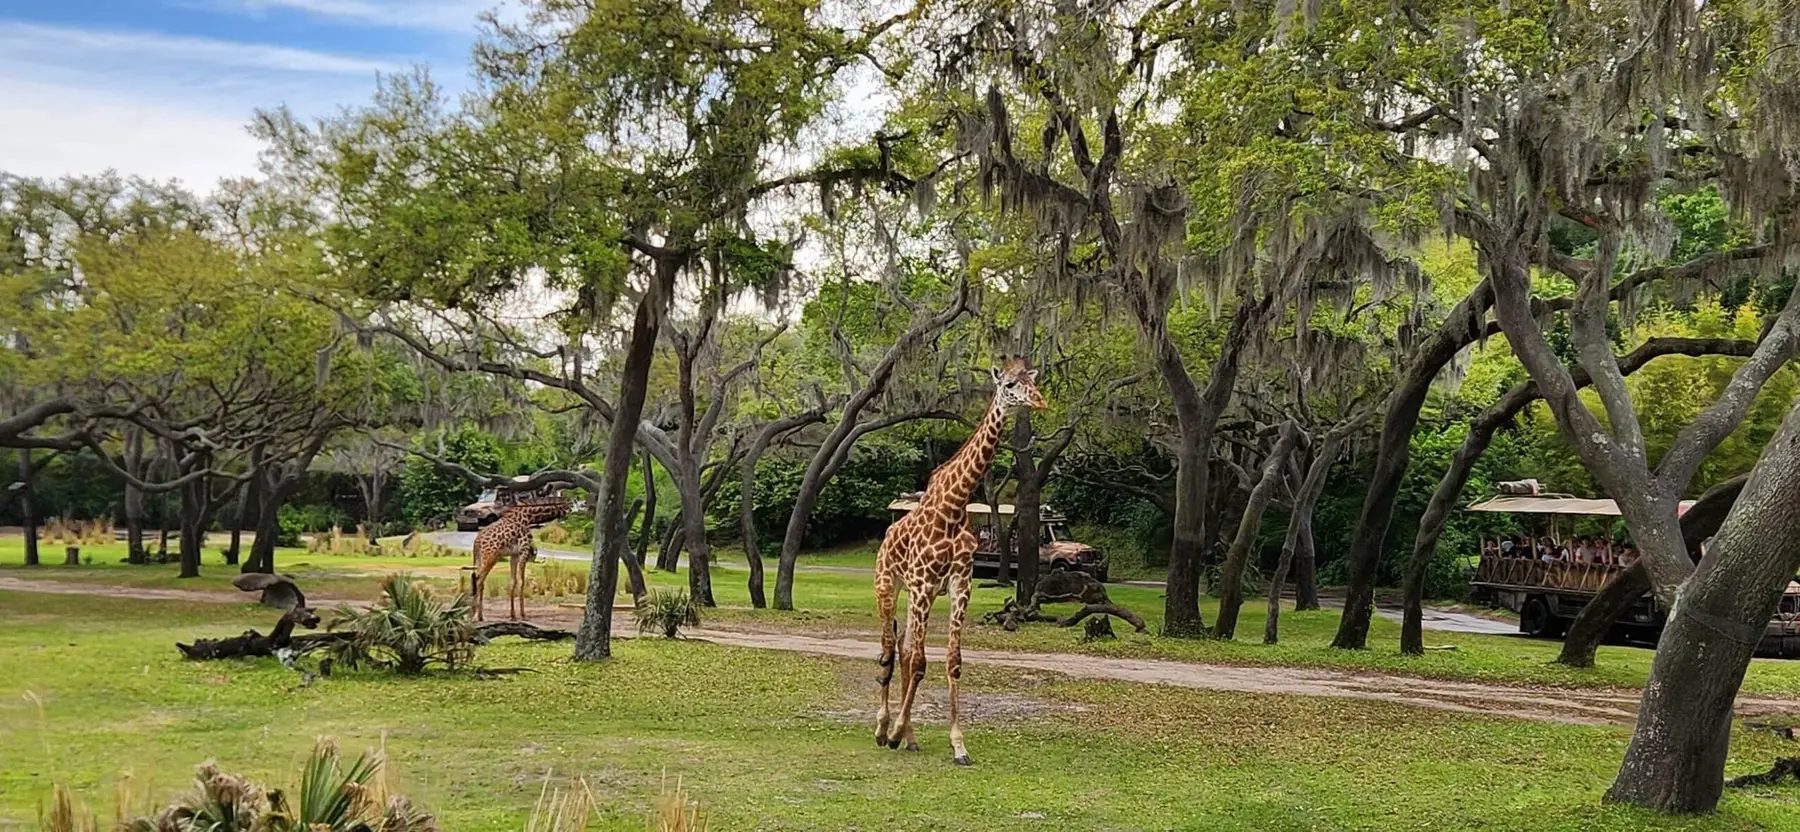
You can’t come to Animal Kingdom and not do the safari! You will board a large safari truck that has bench seats that fit 4-5 people each (about 35 people per truck). Each truck is driven by a cast member who will lead you on a tour through the African Savannah and will teach you about the animals and point them out.
The ride can be a bit bumpy so they often ask that small children not sit on the ends on the rows. There are no seatbelts and very small children can sit in an adult’s lap. Bigger kids will love sitting on the ends so they have the best views. Both sides of the truck will see a lot of animals, but my kids say the left side is a bit better and like to fight over who gets that spot.
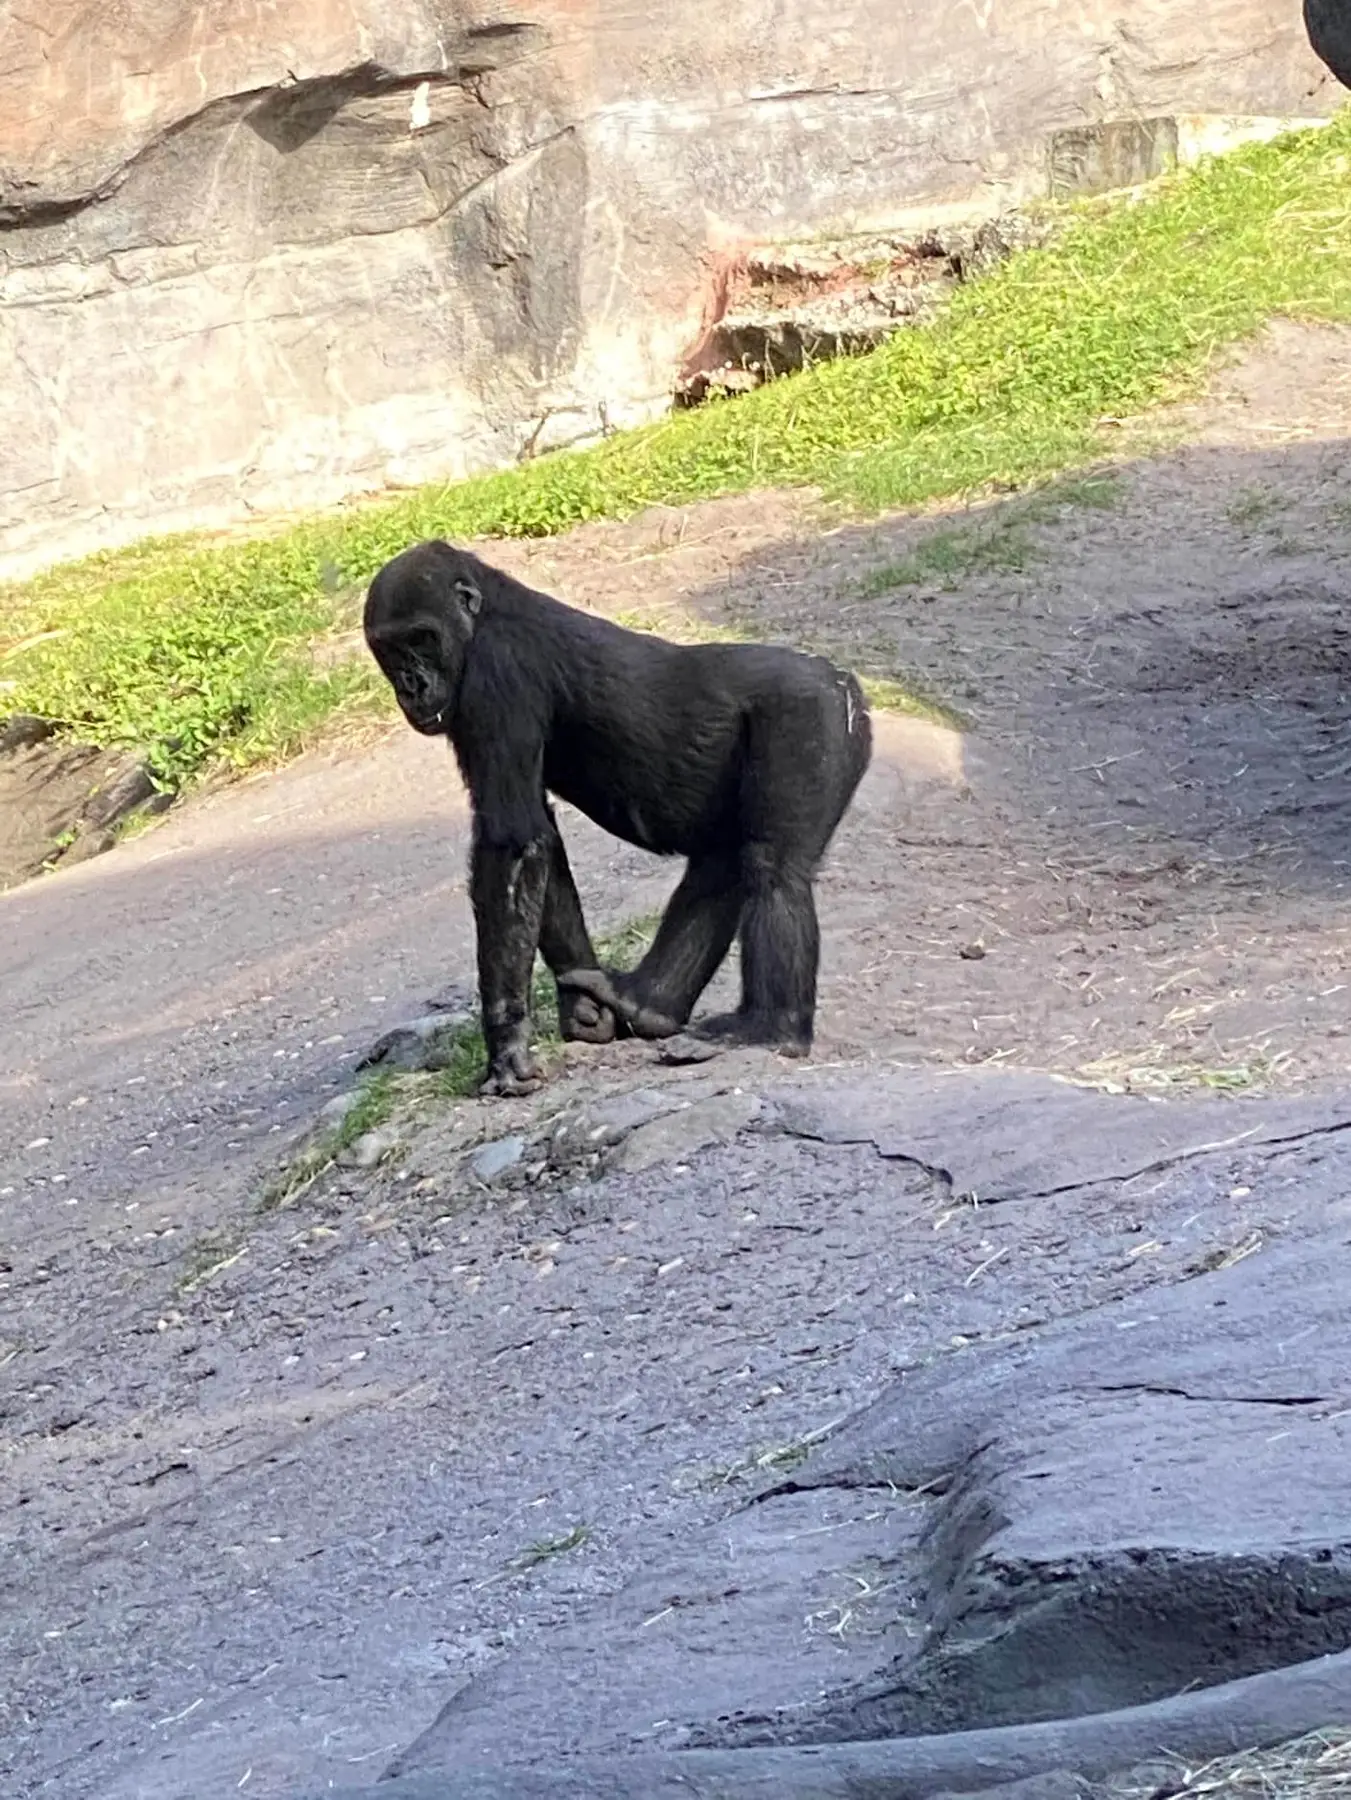
It’s truly an incredible safari! Disney did such a great job designing the area to look authentic and you will never see any cages or fences so it really feels like you are in Africa. There are around 34 species in the safari, and some of them are free roaming and can get quite close to the trucks which is always very exciting!
Height requirement: None
Queue: The queue is outdoors but covered and has some fans. It can get hot, but at least you’re never in the sun.
Ride length: About 20 minutes (but can vary if an animal gets in the way of the truck!)
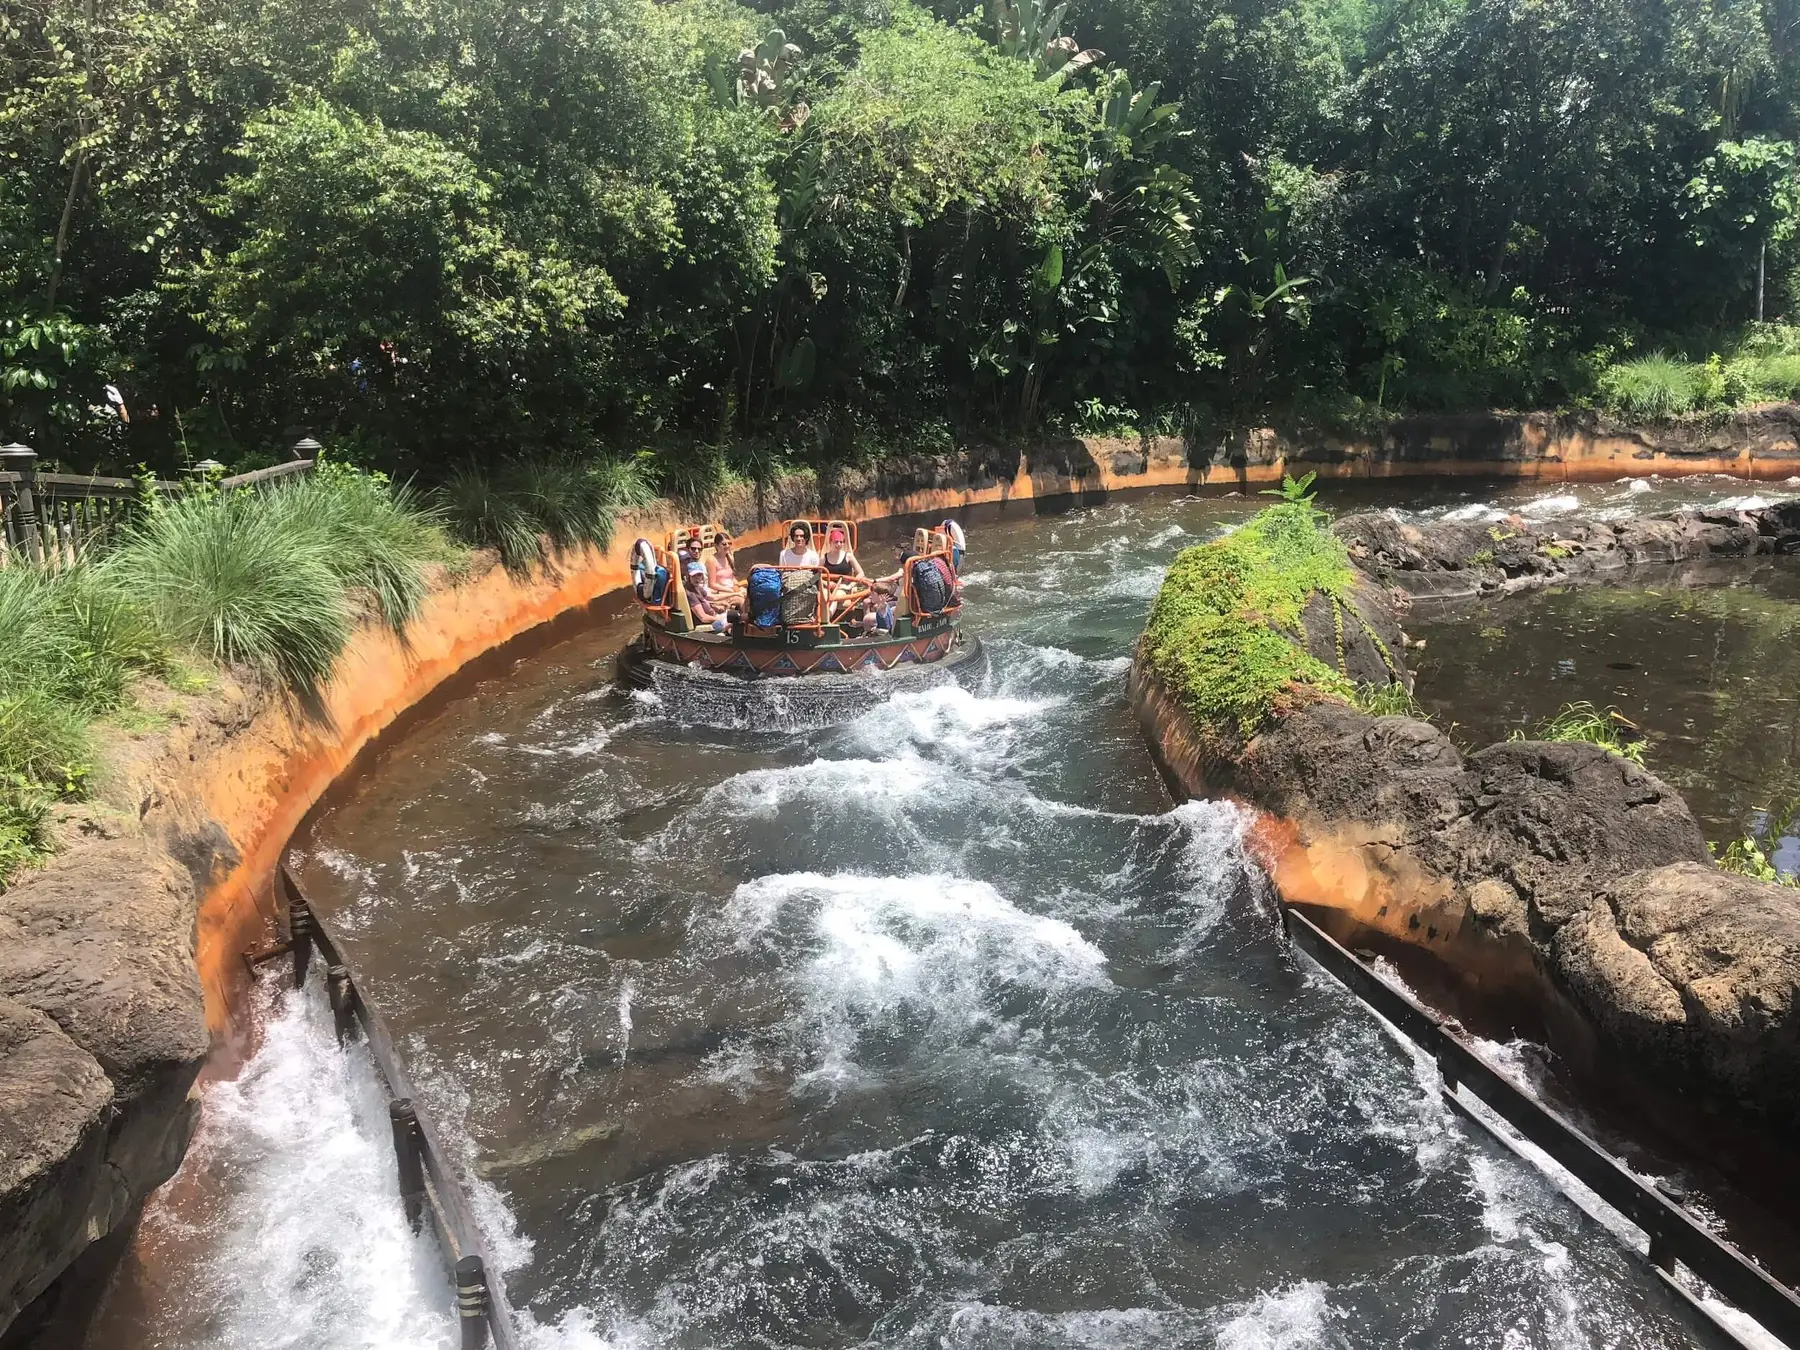
This is a classic white water ride where you sit in a round raft and go through a river of rapids and things to get you wet. But because it’s Disney there is more theming than other theme parks and you’re going through a beautiful rainforest and temple ruins.
You will get wet on this ride! That’s part of the fun! But there are also times you don’t want to get wet, but still want to ride the ride, so in those cases I recommend a poncho or a trash bag you bunch a hole in for you head. We usually order a pack of cheap ponchos from Amazon that are small enough to fit in any bag and we’ll bring those along for water rides and rain.
I recommend leaving your bags in a stroller or putting them under a poncho. If you’re wearing sneakers, I recommend lifting your feet up onto the bar in the center or taking off your shoes and putting them under a poncho so you don’t have soaking wet shoes the rest of the day.
Things to know:
Height Requirement: At least 38″ tall. Rider swap available.
Seats: Each raft seats 12 people in a circle. The seats are plastic with a lap belt.
Queue: The queue is actually really beautiful and has a lot of great detail to look at as you wind through an ancient Southeast Asian temple. The queue is covered, but open mostly open air so it can get hot. I don’t recommend waiting more than 45 minutes for this ride.
Ride Length: 3.5 minutes
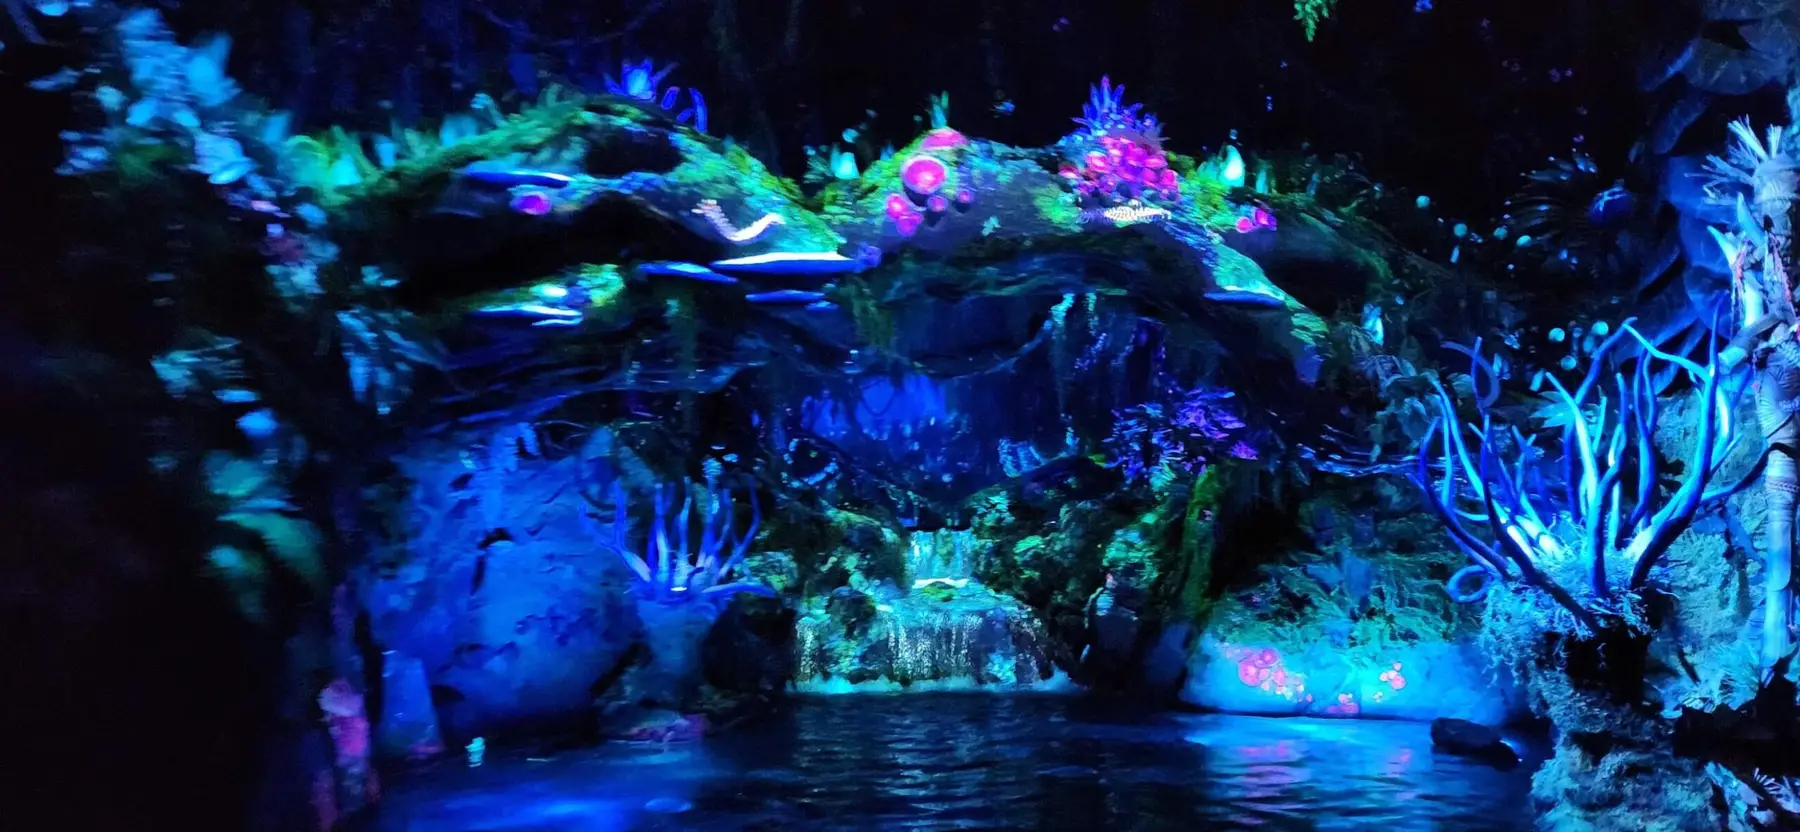
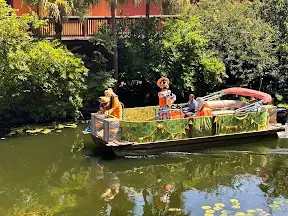
Na’vi River Journey is a typical Disney dark ride where you sit in a boat and see things. It takes you through the forest of Pandora where you will see lots of beautiful bioluminescent plants and unique animals. One of the scenes includes one of the most advanced animatronic character ever created as the Na’vi Shaman sings and moves in connection with nature.
If you aren’t familiar with the Avatar movies, it is still an enjoyable boat ride seeing pretty things, but there’s no real storytelling in the attraction.
Ages: Suitable for all ages including babies on laps.
Queue: The queue is either shaded or indoors unless it extends past the entrance.
Ride Length: 4 1/2 minutes
Seating: 4 rows per boat/raft. Each row seats 3-4 people.
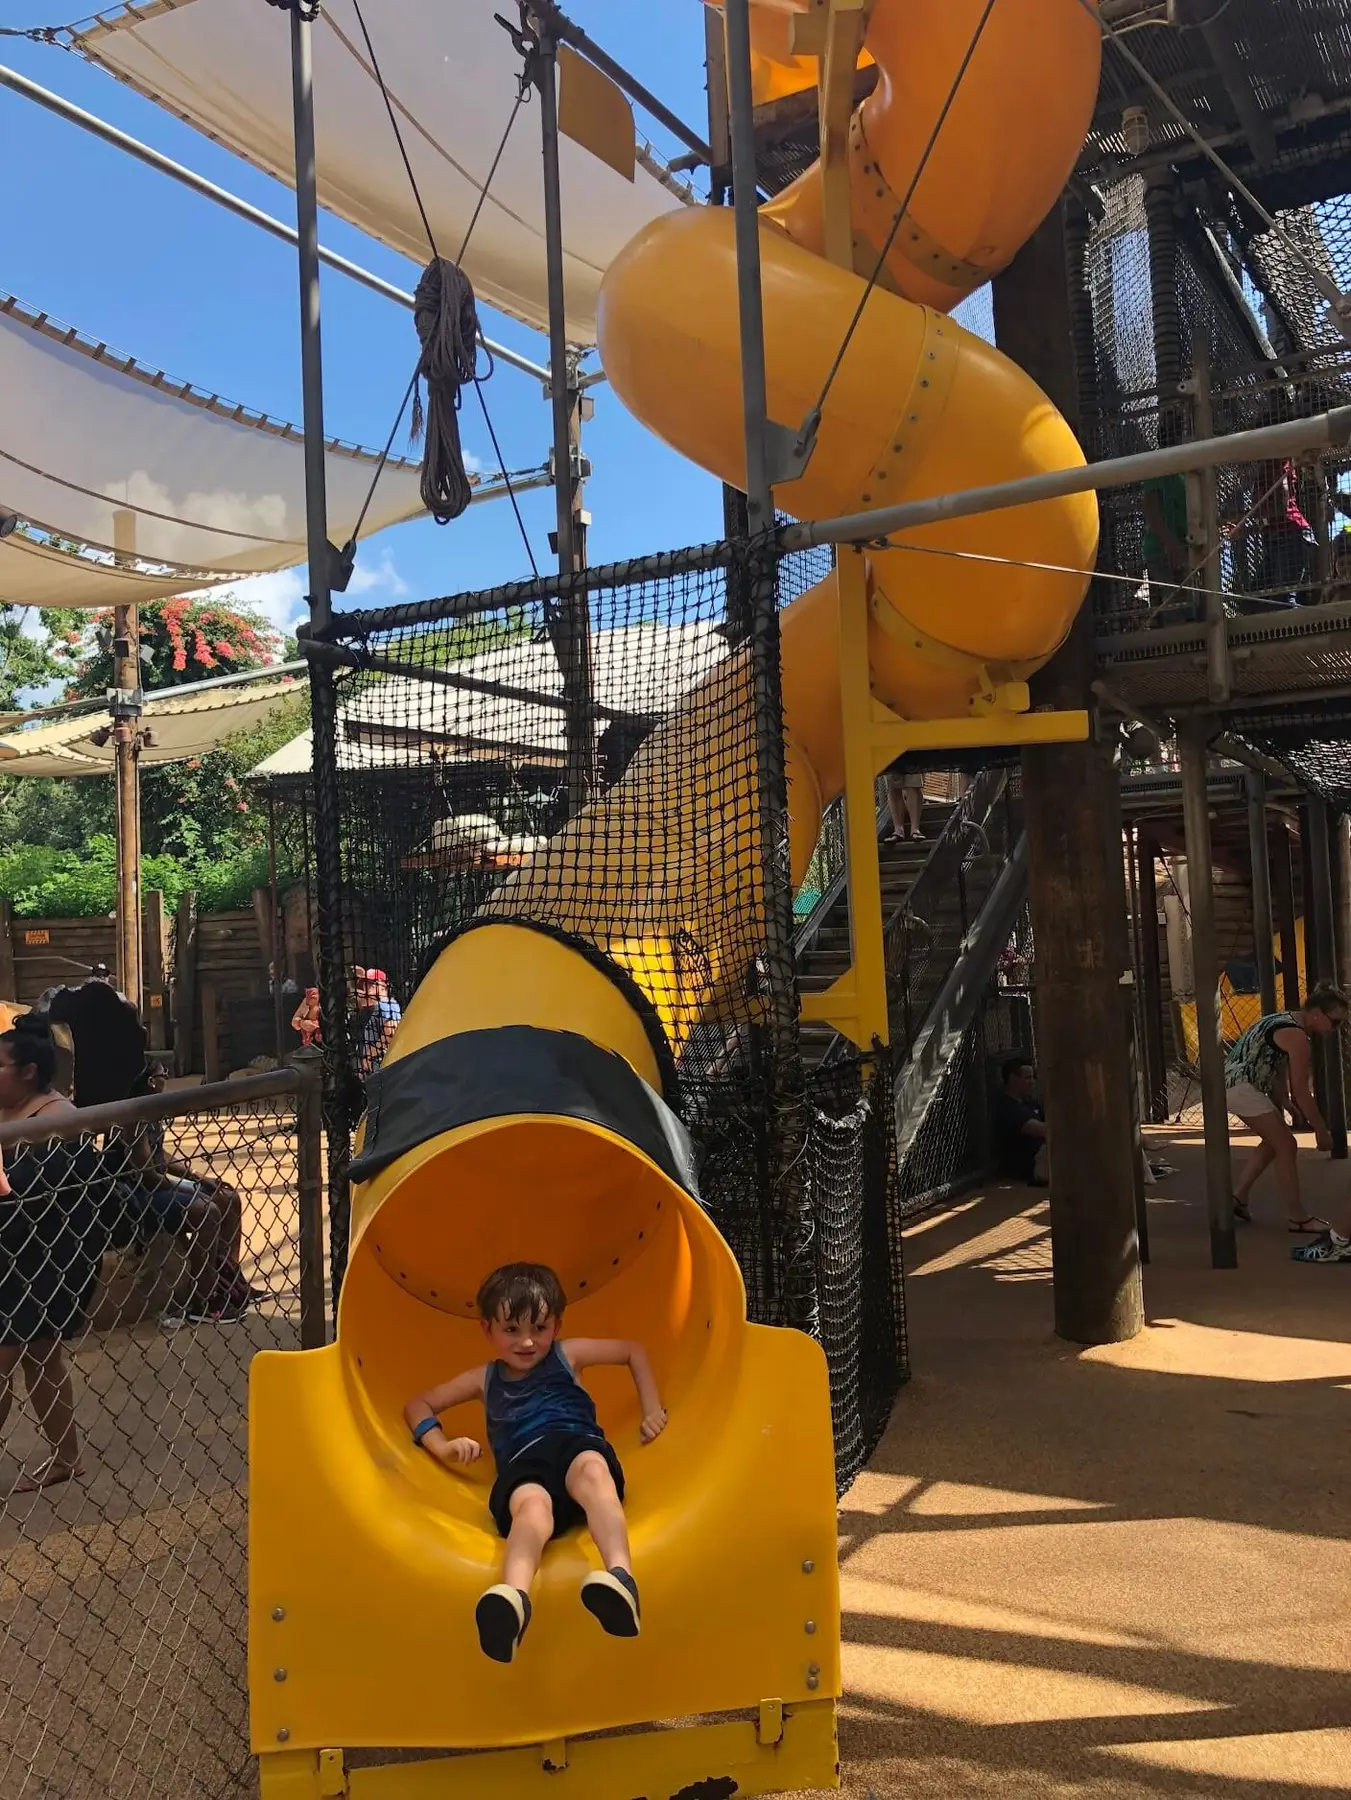
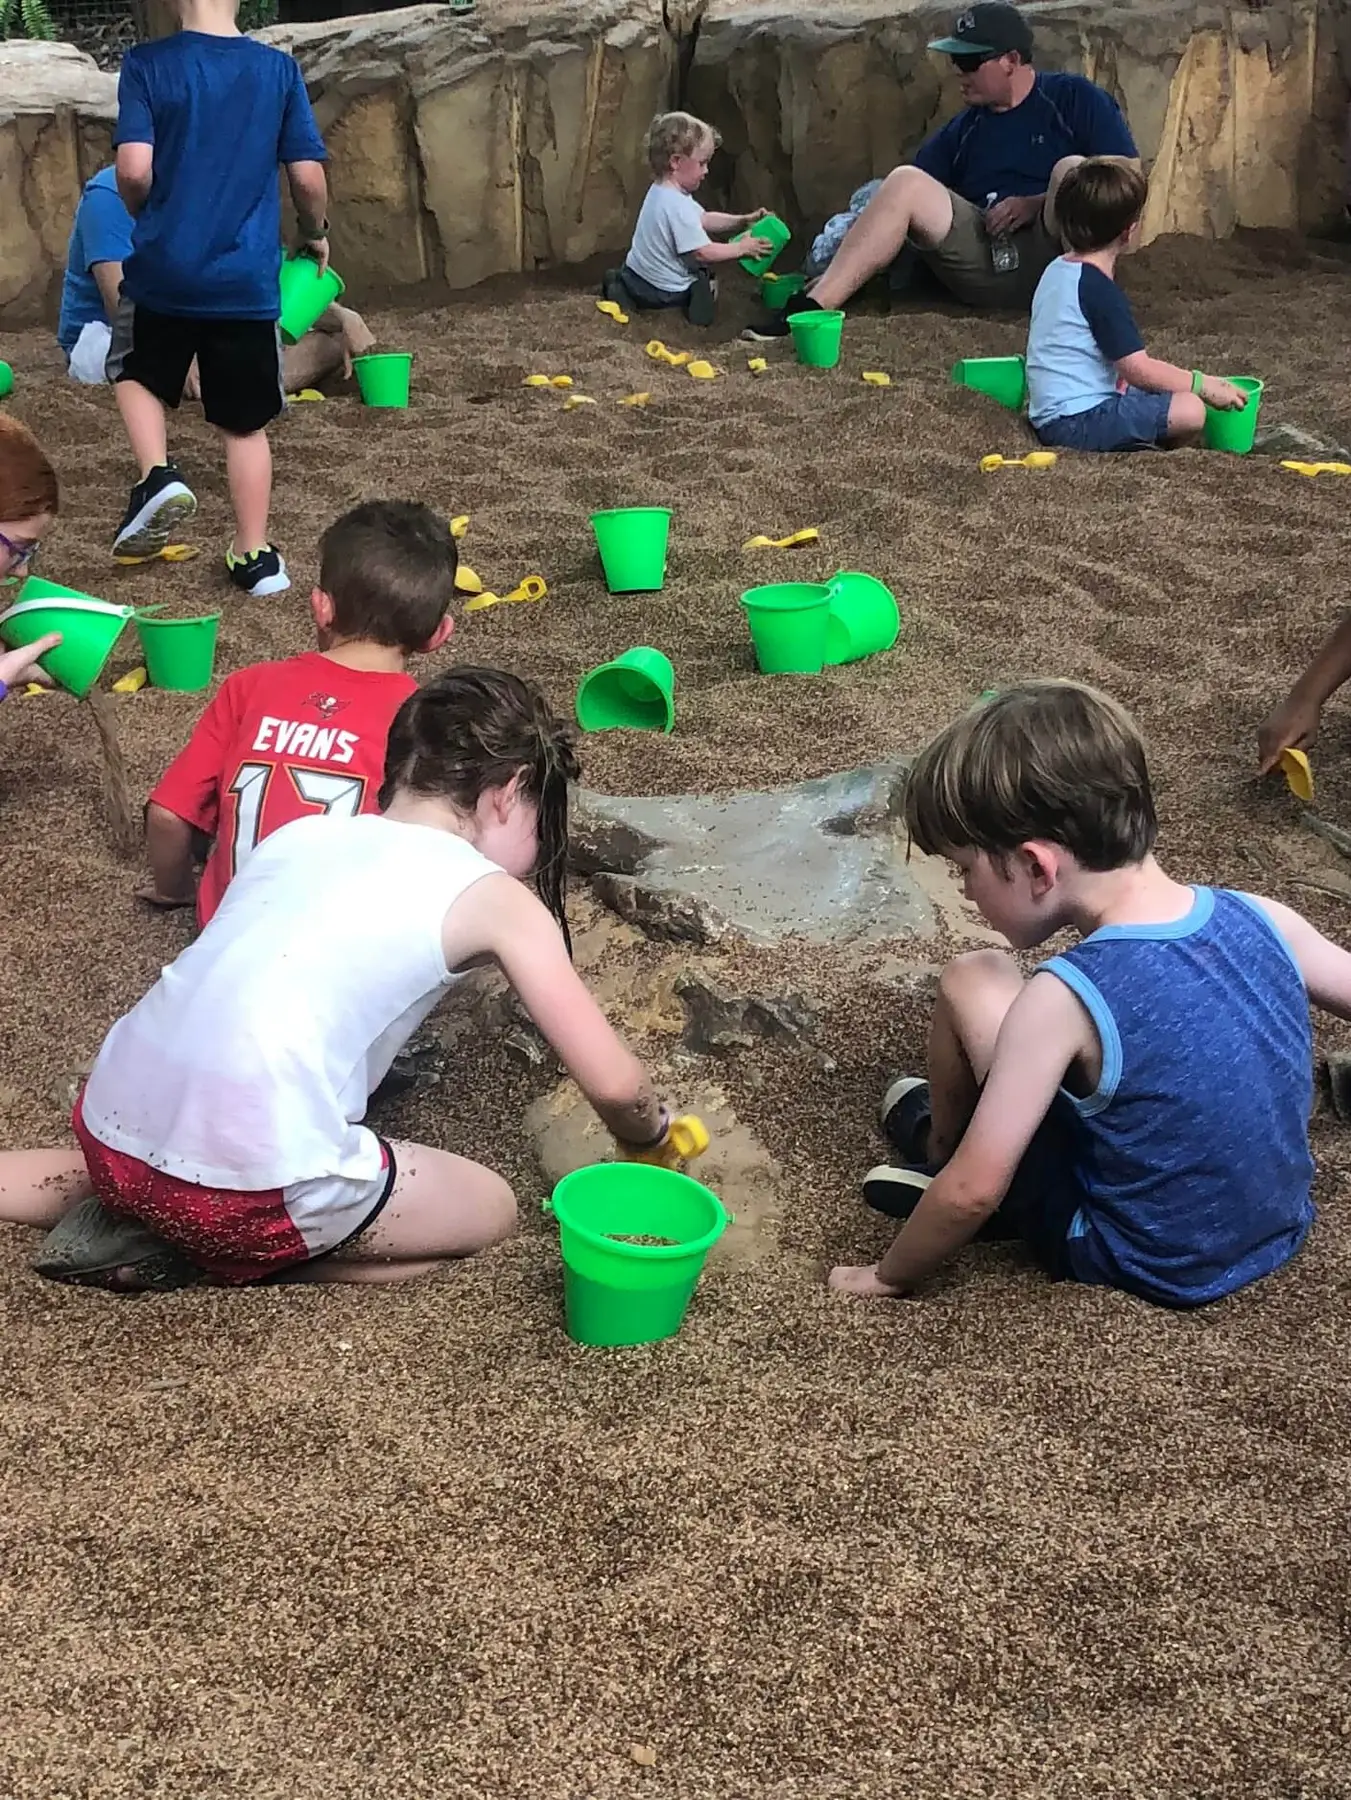
The Boneyard is a huge dinosaur-bone-themed play area. It can be a little tough to keep eyes on your kids as they run around so I recommend having a “home base” where an adult always is and your kids know to come check in.
There is dinosaur dig area where kids can dig for dinosaur bones in the sand. This area is separate from the slide area and connected by a overhead bridge, so if your kids want to head that way you may want to follow. The entire area is completely closed off though so they can’t get lost and the only way in and out of the boneyard has a gate and a cast member.
Photo Gallery